Platform
Xbox One, PS4, PC
Published
Zenimax, 2016
Overview of Work
- Game Design – Worked on initial weapons design, enemy design, combat design, and wrote original pitch for SnapMap UGC mode.
- Level Design – Blockout, mission design, gameplay, and scripting for four levels & multiple areas.
- Art – Final geometry, UVs, first pass lighting, fx, and post processing for five levels & multiple areas.
- Code – Implemented entities, gameplay tools, and scripted sequences in C++.
Example of my work from blockout to final geometry and UVs.
Game Design Process
Finding Game Pillars
I believe great design starts with constraints & guided thinking. What are your most important goals? If design, story, and art ideas don’t speak to these pillars then consider removing them or modifying them.
One example from the Doom project is “Movement as a defense.” When discussing ideas, we could ask ourselves, does this feature encourage movement?
Mechanics, Dynamics, Aesthetics
Mechanics describes the particular components of the game, at the level of data representation and algorithms.
Dynamics describes the run-time behavior of the mechanics acting on player inputs and each others outputs over time.
Aesthetics describes the desirable emotional responses evoked in the player, when she interacts with the game system.
– Robin Hunicke, Marc LeBlanc, Robert Zubek
MDA methodology was not a formal part of our process on Doom but it is part of my thinking. For example, on the enemy design I advocated we keep their mechanics simple, predictable, and that they encourage player movement in some unique way. On their own they may appear one dimensional and not very challenging, but in concert the combination of each enemy type could create compelling situations.
The Design Pillars on Doom were also very much Aesthetic goals to help guide much of the thinking.
Finding Inspiration
Finding example games to point to is another great tool. Point to specific games, break down its DNA, and specifically point out which genes are worth imitating and apply those to your pillars.
Examples from Doom:
- Doom 1 – Movement from Doom 1 was something special and early on we decided we wanted to make a AAA experience that focused heavily on movement. Sound design & enemy design were also key takeaways.
- Dark Souls – In many ways Dark Souls combat is more of a puzzle than skill test. We wanted predictable enemies with clear telegraphs that encouraged unique movement patterns.
- Assassin’s Creed – What would a modern game all about movement look like? We didn’t want to be Serious Sam. The parkour elements of Assassin’s Creed were a great example.
In early development the ideal result is being able to say something like, “Classic Doom meets Dark Souls meets Assassin’s Creed” which conveys a ton of information & direction.
Focus Testing
Think you have your pillars and inspiration down? Prove it! I believe good designers seek evidence to confirm or challenge their beliefs. Don’t be married to your ideas. Internal testing, family testing, and external testing were used during the development of Doom. Observational testing was incredibly valuable and revealed many unseen issues.
SnapMap Design
In early 2013 I wrote the initial pitch & design for the SnapMap mode in Doom. SnapMap mode allows users to choose from a library of room modules then snap them together to quickly create levels. Users can activate an AI director or go into each module for more specific customization.
The proposal was heavily inspired by the original Doom mapping community, Snow Crash, and Draw Something. The goal was to recapture the community that formed around Doom where people could create, share, and discuss new levels but take it to a mainstream level of accessibility. It would ideally be a mode with infinite replayability.
Shortly after the proposal was shared John Carmack began the creation & prototype of this mode. Within a few weeks a prototype was playable, the team then decided it would be the third mode for Doom along with SP & MP. A small team continued to develop this mode while I continued to work on SP throughout most of Doom’s development.
I believe UGC will continue to be a very important element for games going forward. We’ve already seen massive success here in games like Minecraft & CS:GO.
Level Design Process
Below was the ideal process for level creation.
- High Level Gameplay Goals – In documentation identify what the primary gameplay experience(s) will be.
- High Level Narrative Goals – What major narrative beats take place during this level? Not exact details but major plot points.
- Game Arc Mappings – Difficulty, Weapon Introduction(s), Enemy Introduction(s), Mechanic Introduction(s). Know what has to be introduced and generally how. These often have to change so be flexible.
- Early Concept – Sometimes we liked to begin with a concept piece before paper design & blockout. It helps to quickly hash out some ideas.
- Rough Flow Diagram – Simple flow diagram roughly outline which areas connect to which and general size.
- 2D Map – In my experience 2D maps barely relate to the final level but it helps to think through the entire level.
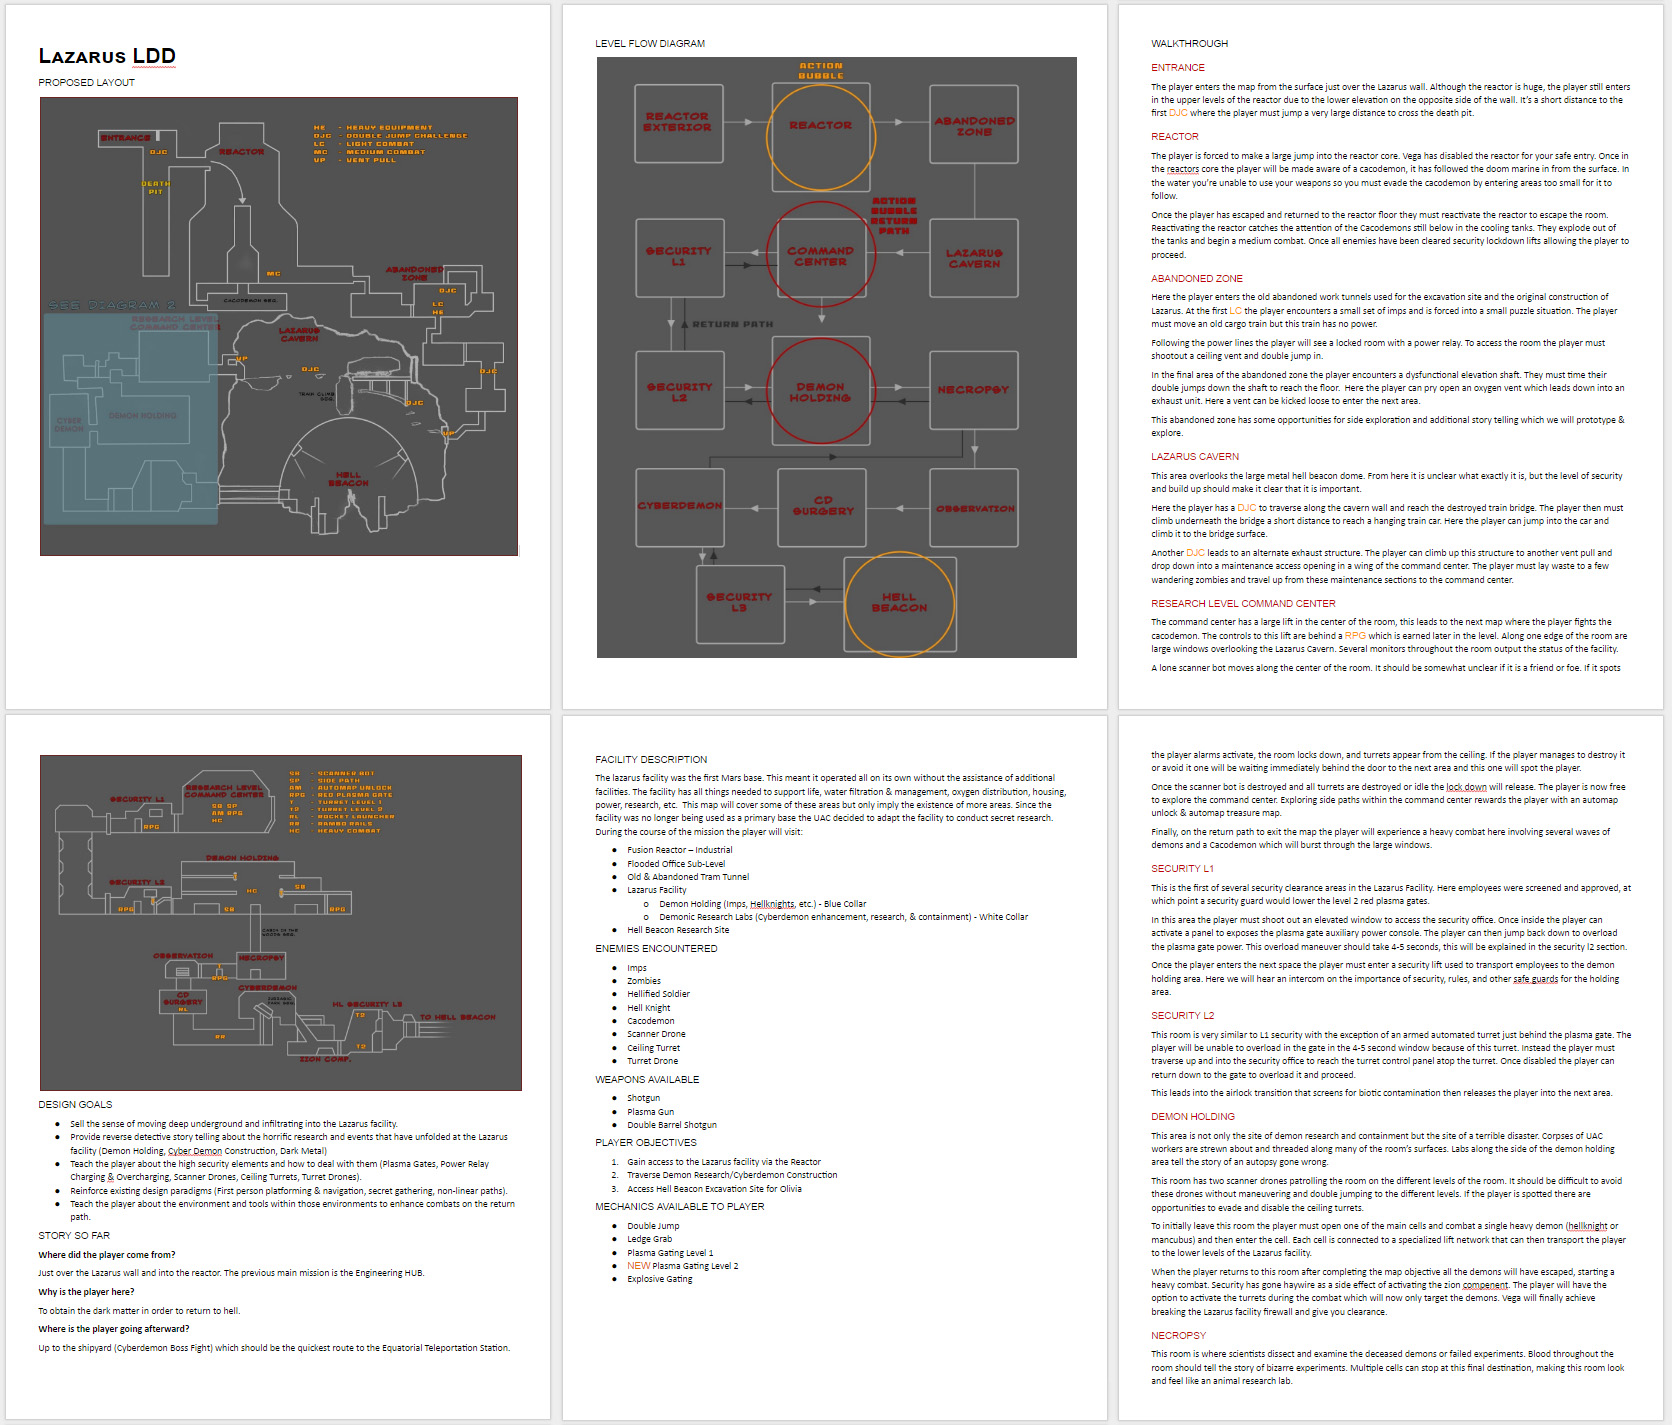
Example 2D design & documentation in template I helped create.
- Blockout Rough Pass – Super rough first pass to get a feel for how spaces connect in 3D. The level is not ready for user review but developers can discuss the outline.
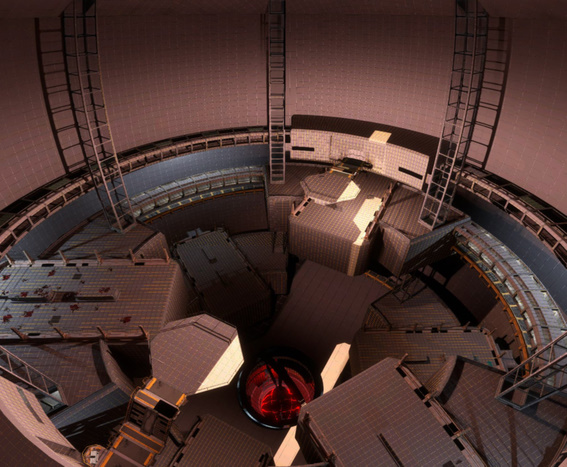
Example of my work on early blockout. This level was laid out in modo using the bend deformer & instances. Hallways & modules were built in mostly 90 degree axis but bent into circular shape. This made final UV and geometry work very easy.
- Blockout Final Pass – Room by room blockout to as close to final experience as possible with primary lights in place. If the gameplay boundary lines need to be changed then the blockout is not complete. Non-developers should be able to get an idea of what the final experience will be without much imagination.
- Gameplay Scripting – As final blockout comes online immediately begin gameplay scripting. The goal is to get as close to a final experience without final textures, prop details, decals, fx, post processing.
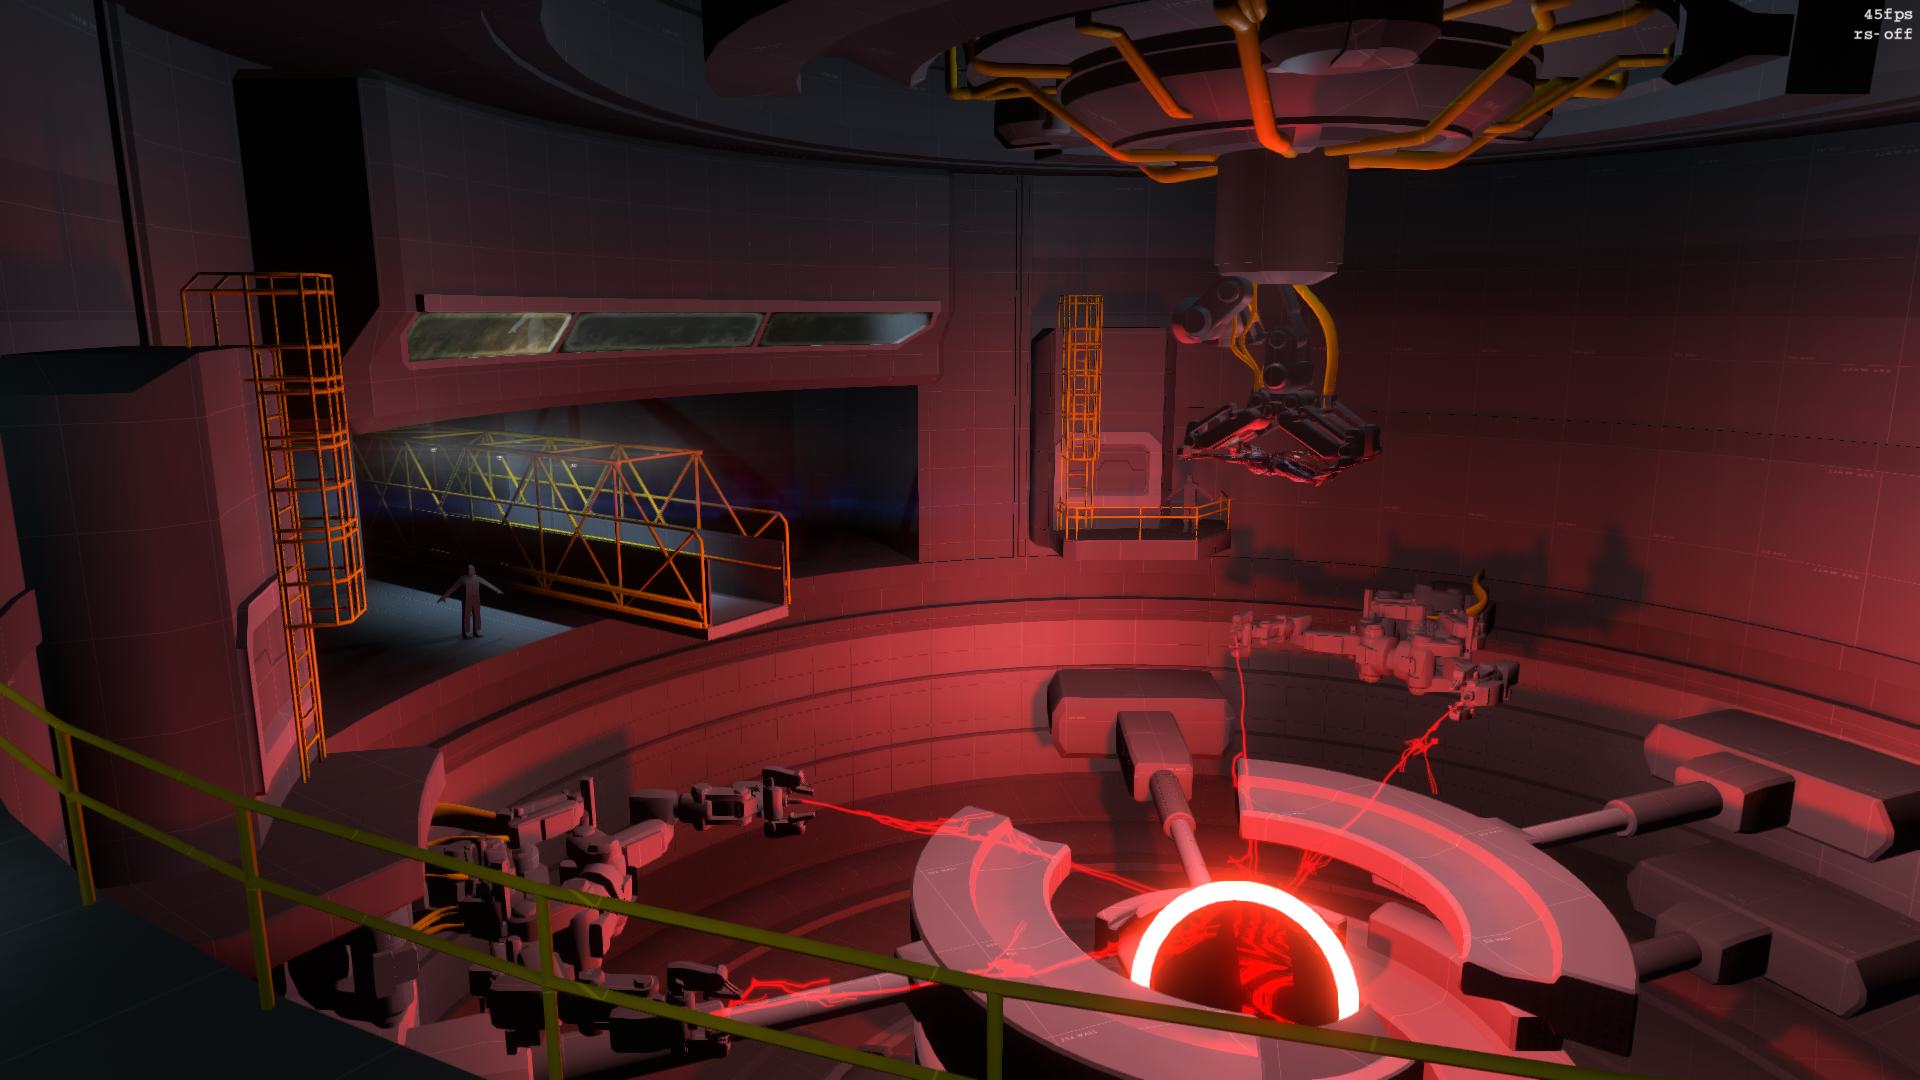
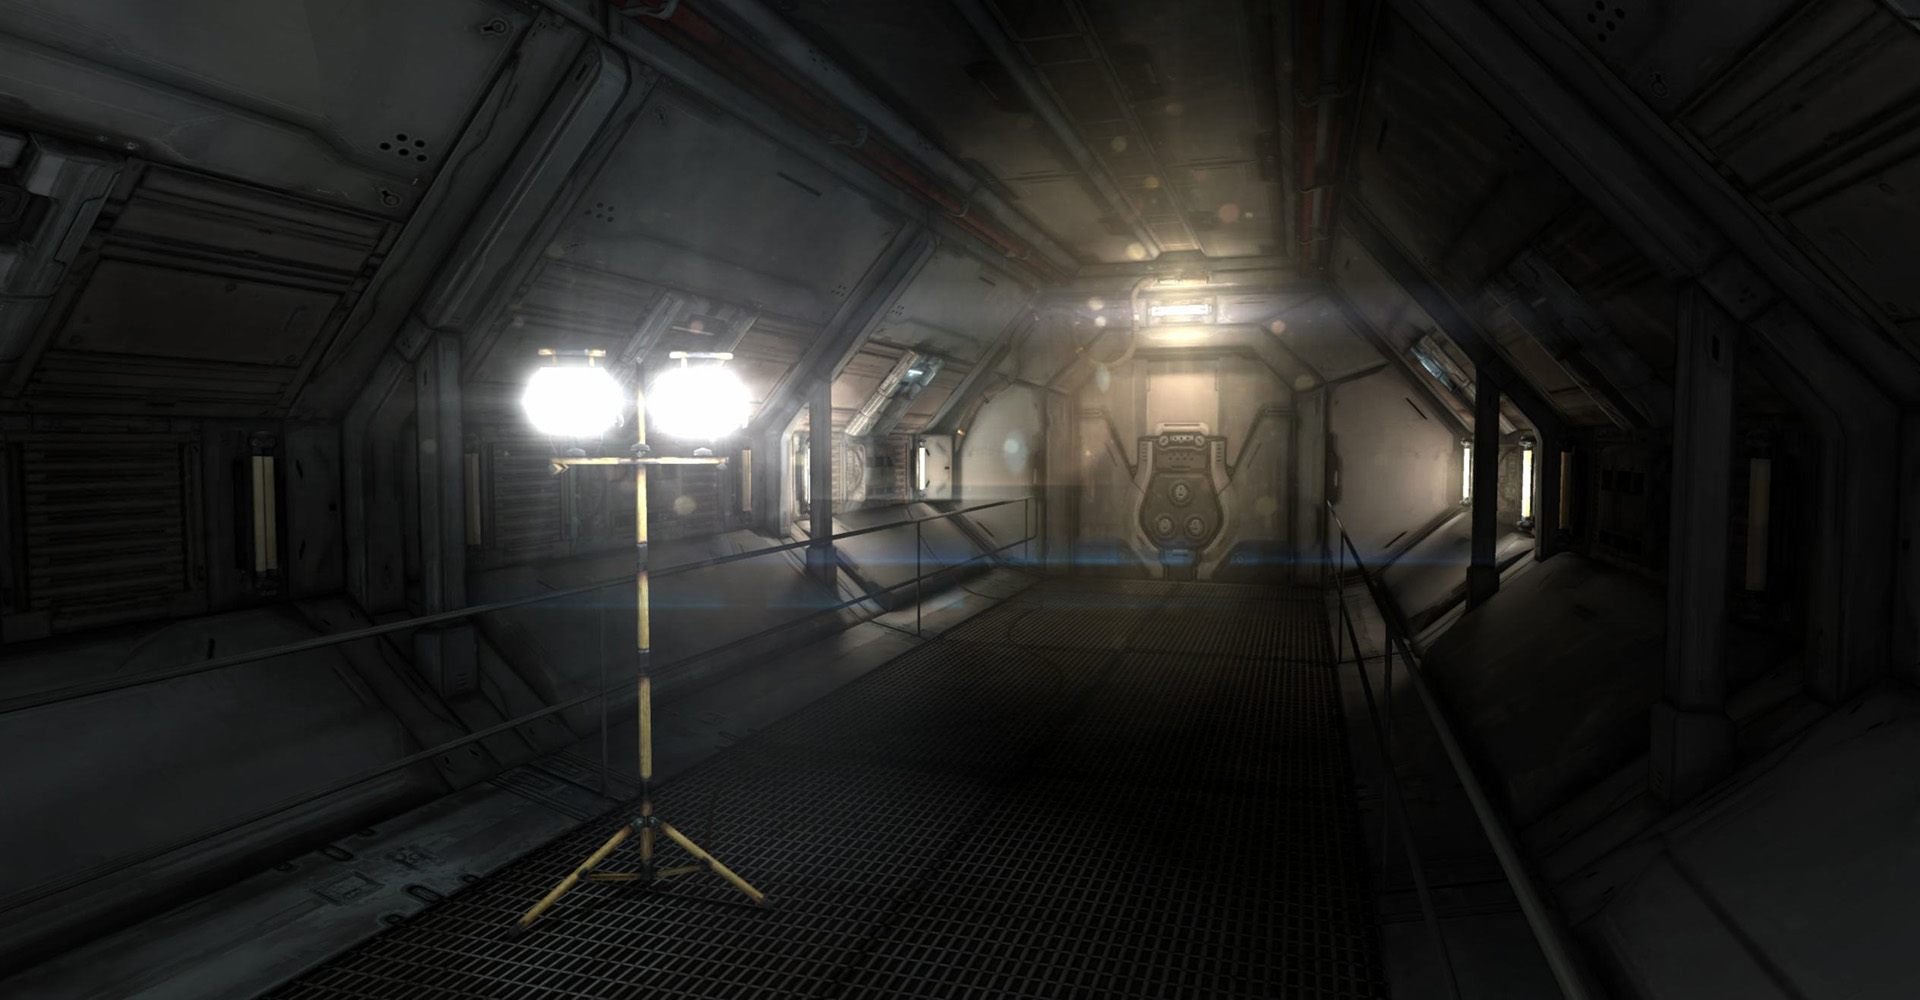
Example of my work on a near final blockout, scripting and key lights are in place.
- Focus Testing – Test the final blockout & gameplay as the spaces come online & once the whole level is ready. Iterate on the last two phases until you’re confident the level could ship.
- Art Pass – Final texturing, prop details, decals, fx, lighting, post process. Review with artist(s) involved before beginning to ensure level goals are not compromised.
- Focus Testing – Test final spaces as they come online again. Final art pass can sometimes cause gameplay or narrative confusion if users are misdirected.
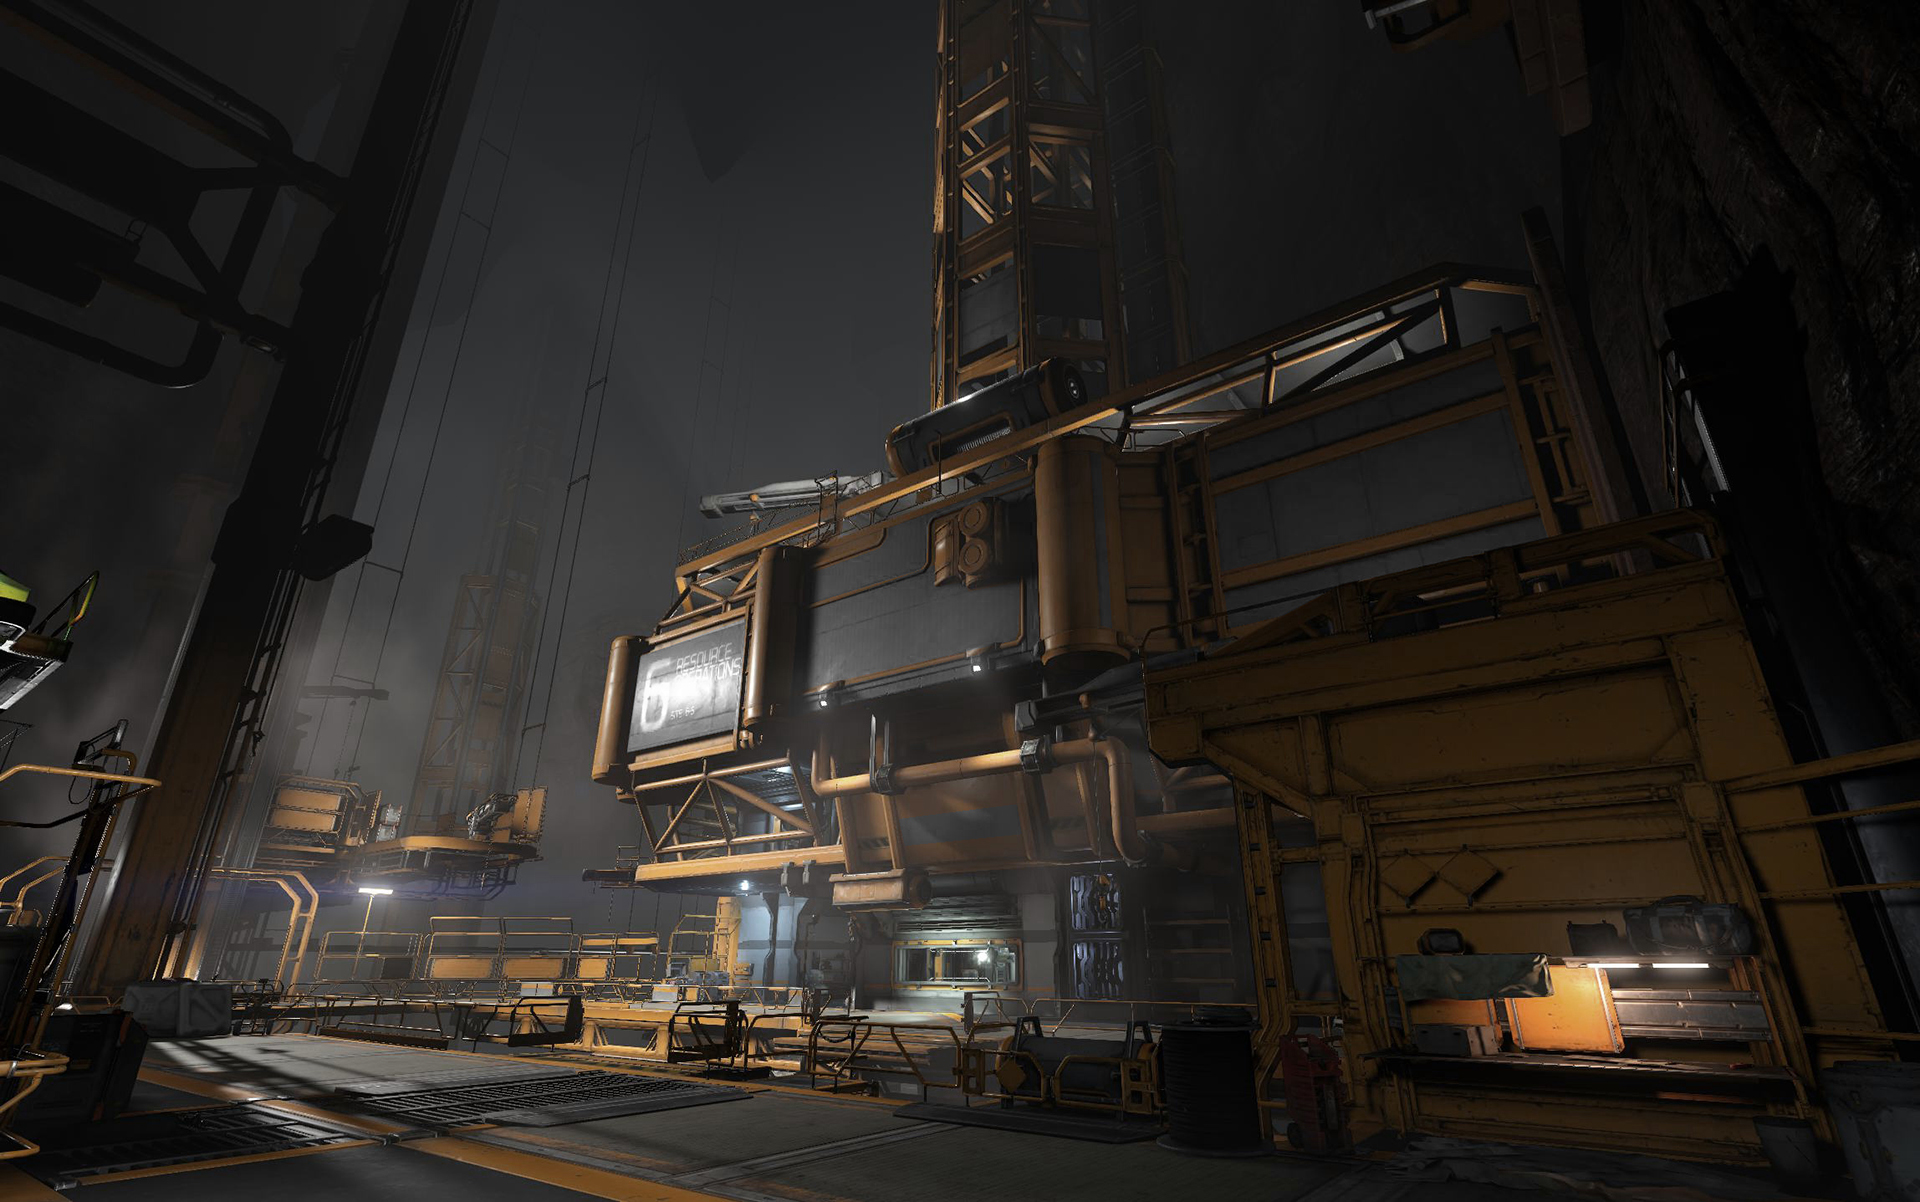
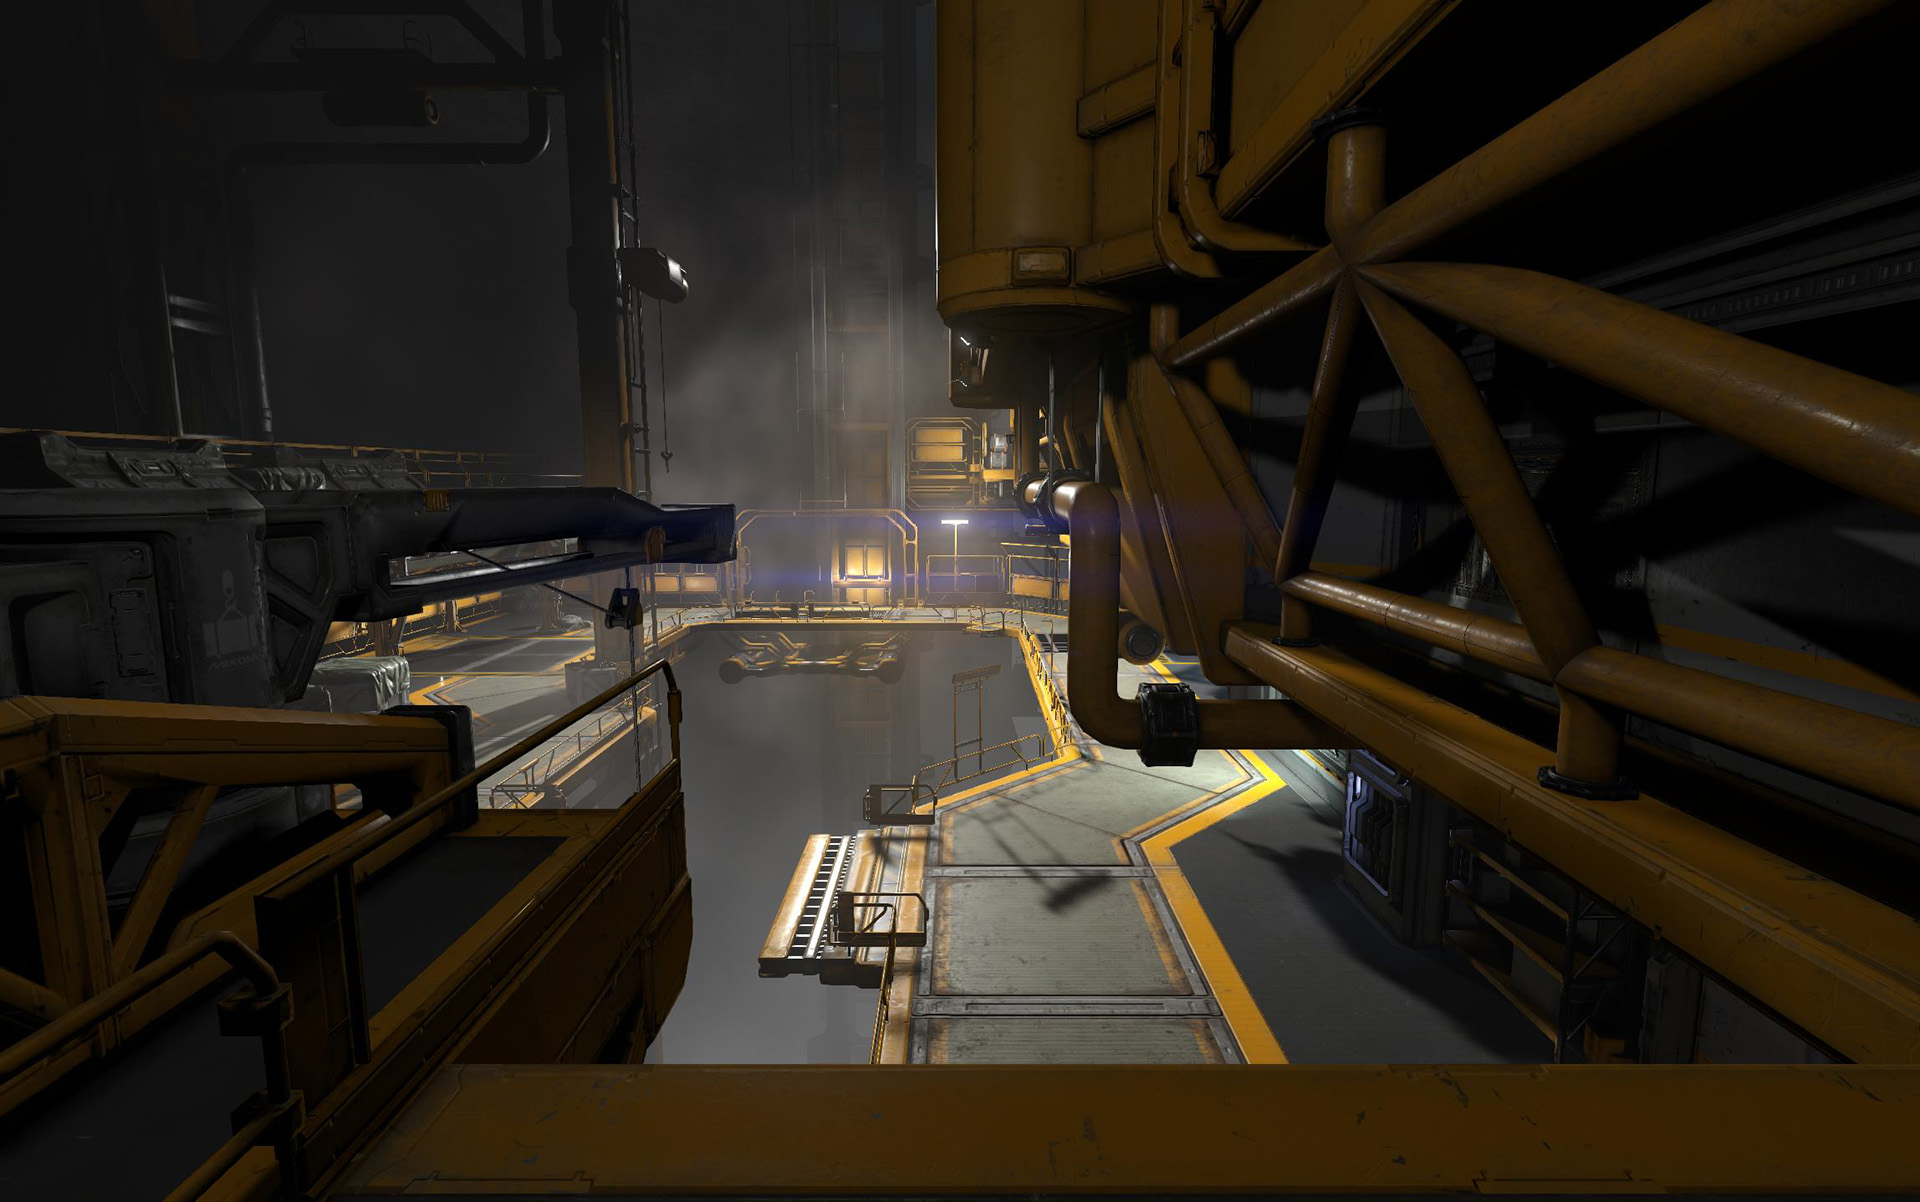
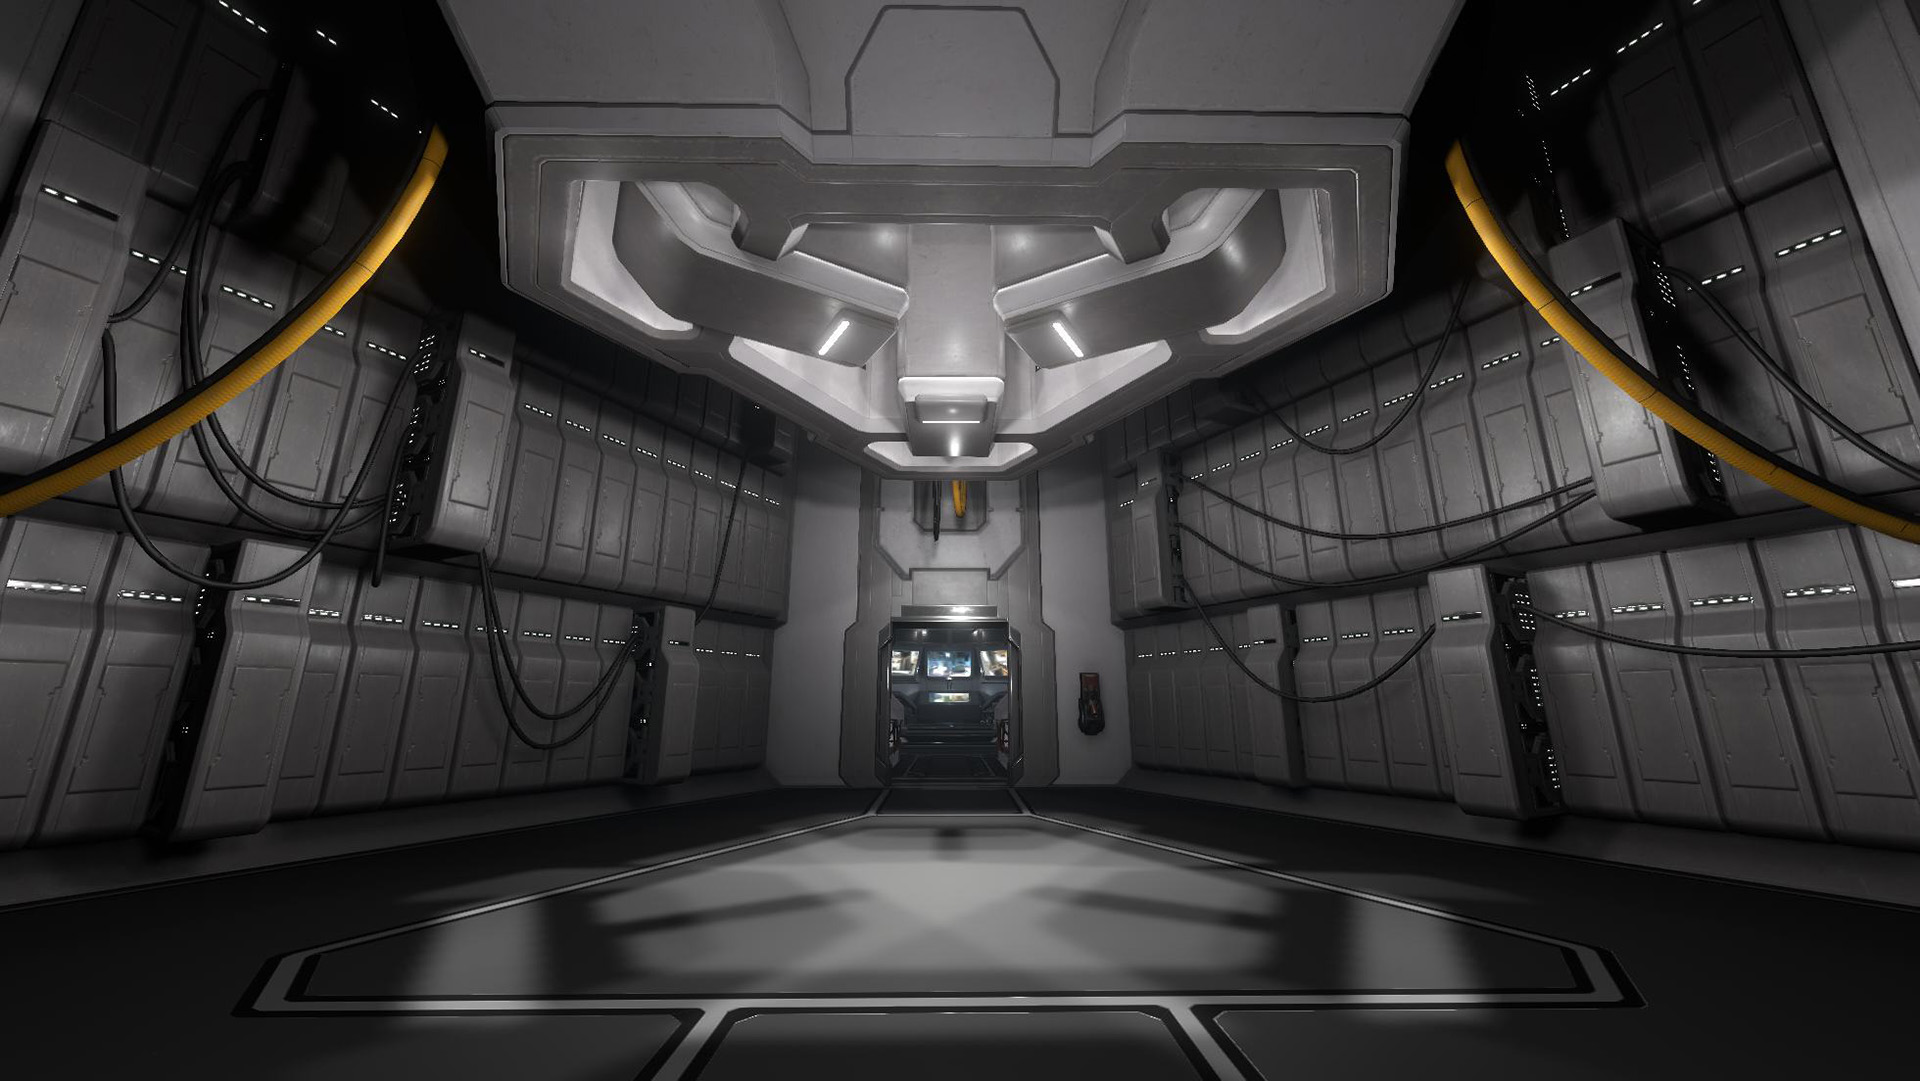
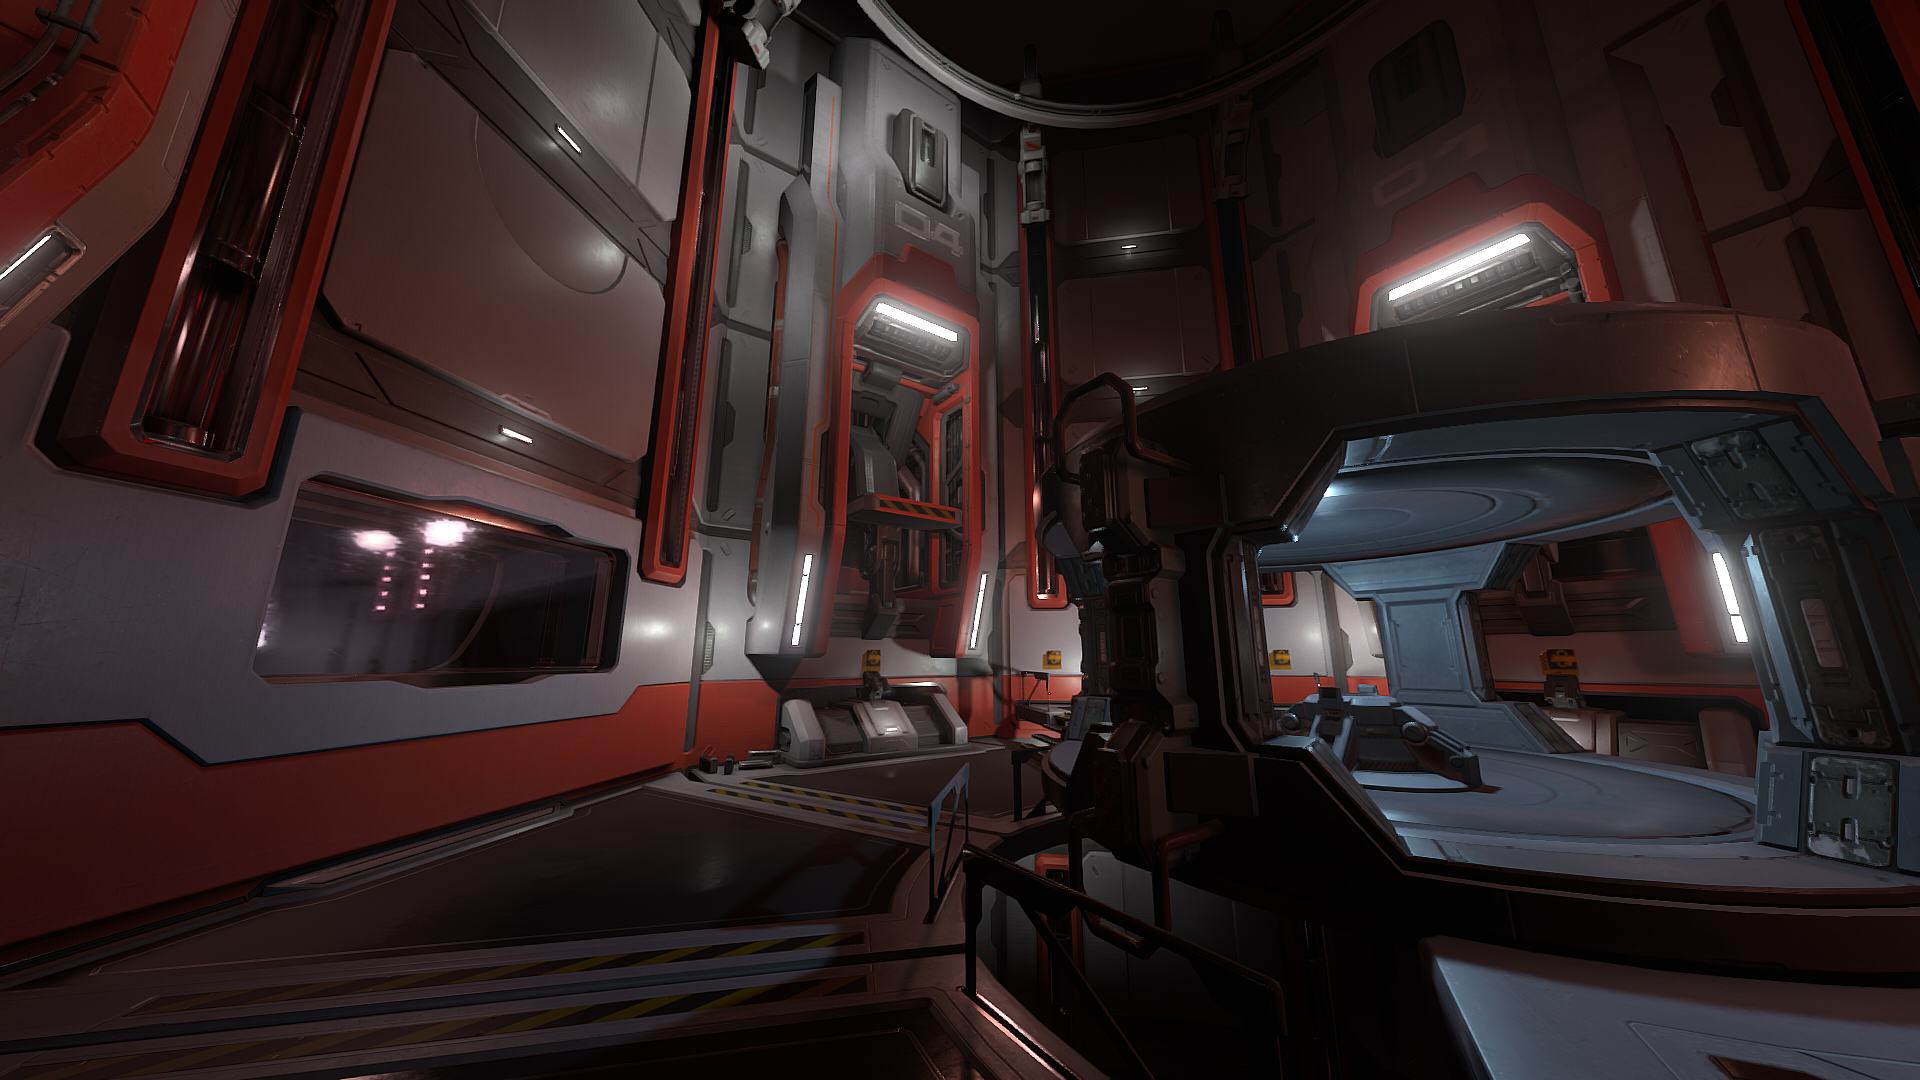
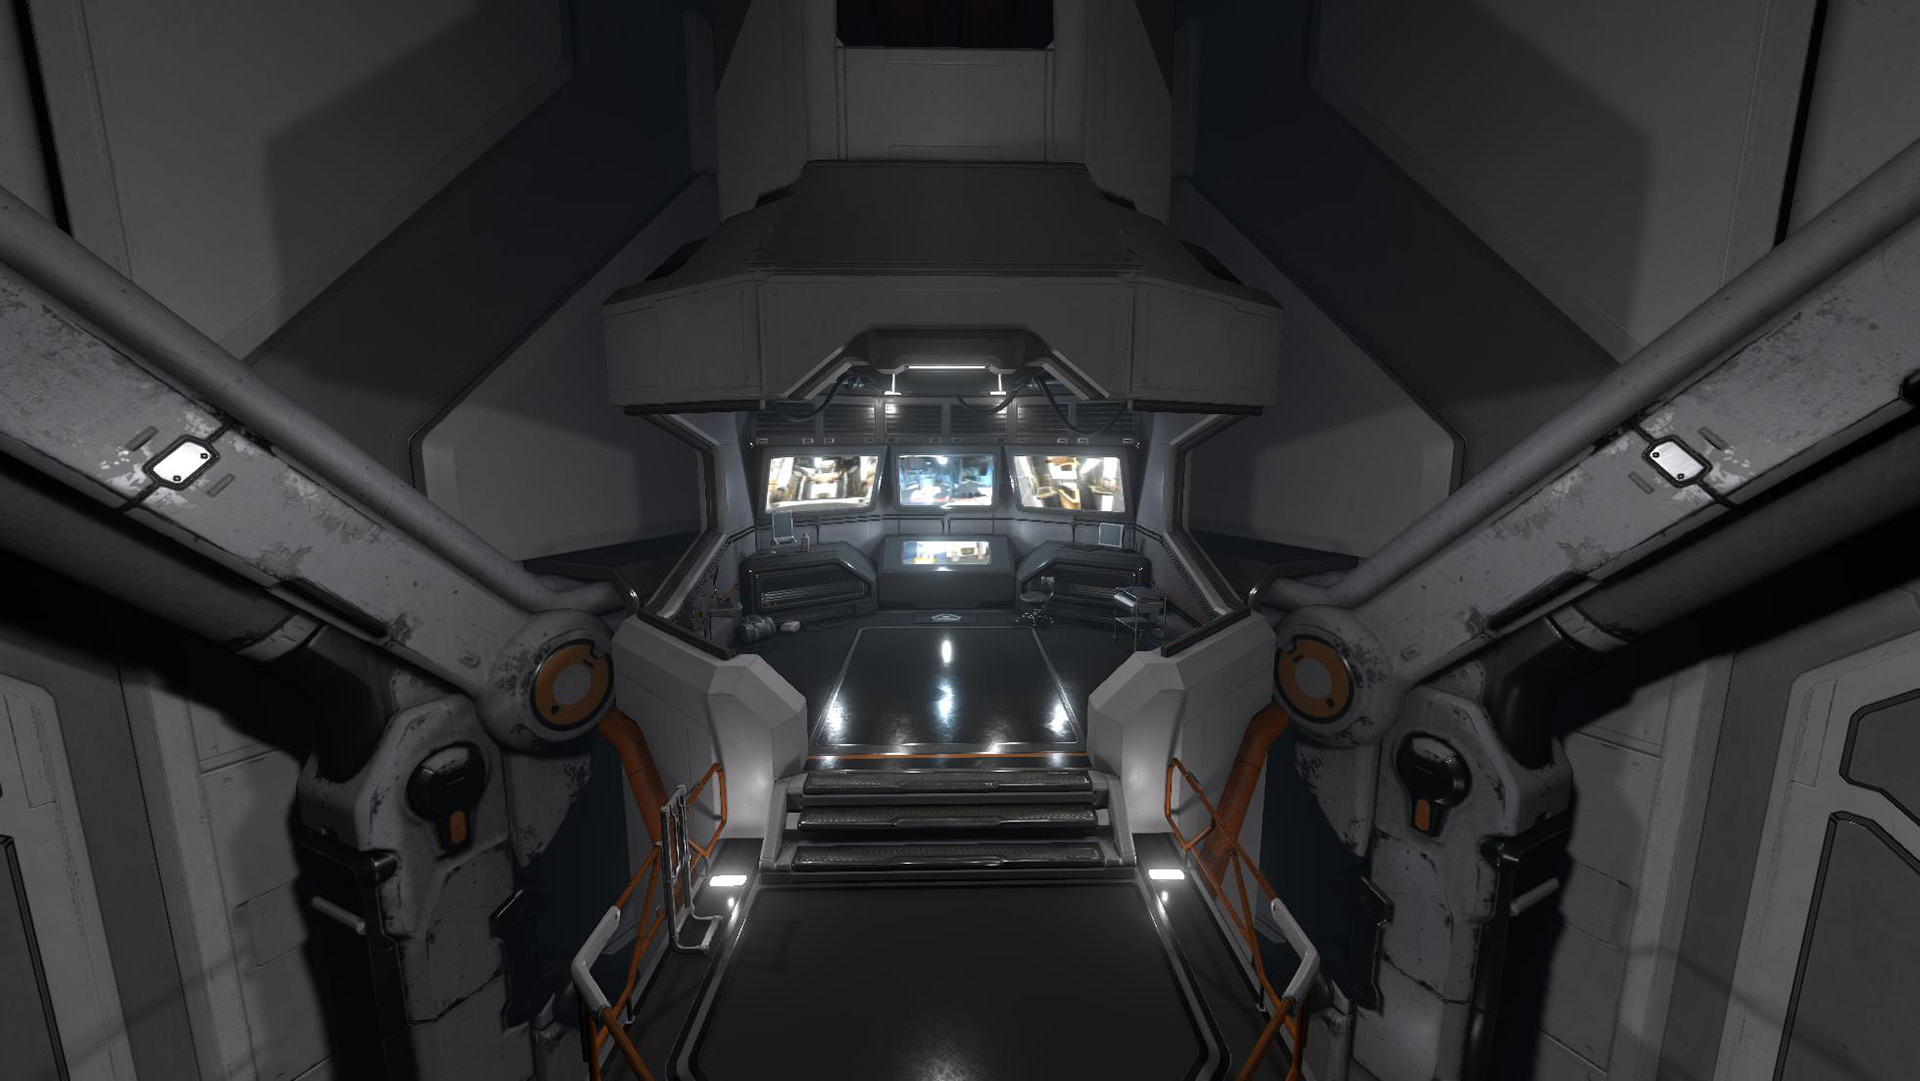
Example of the final results. My work here includes paper design, blockout, some first pass gameplay, scripting, and final geometry in multiple areas. Combat often gets very intense so we intentionally created spaces where the player could quickly get away or get to higher ground to get some time to reset. This level loops around on itself multiple times giving players a chance to preview areas before they arrive.
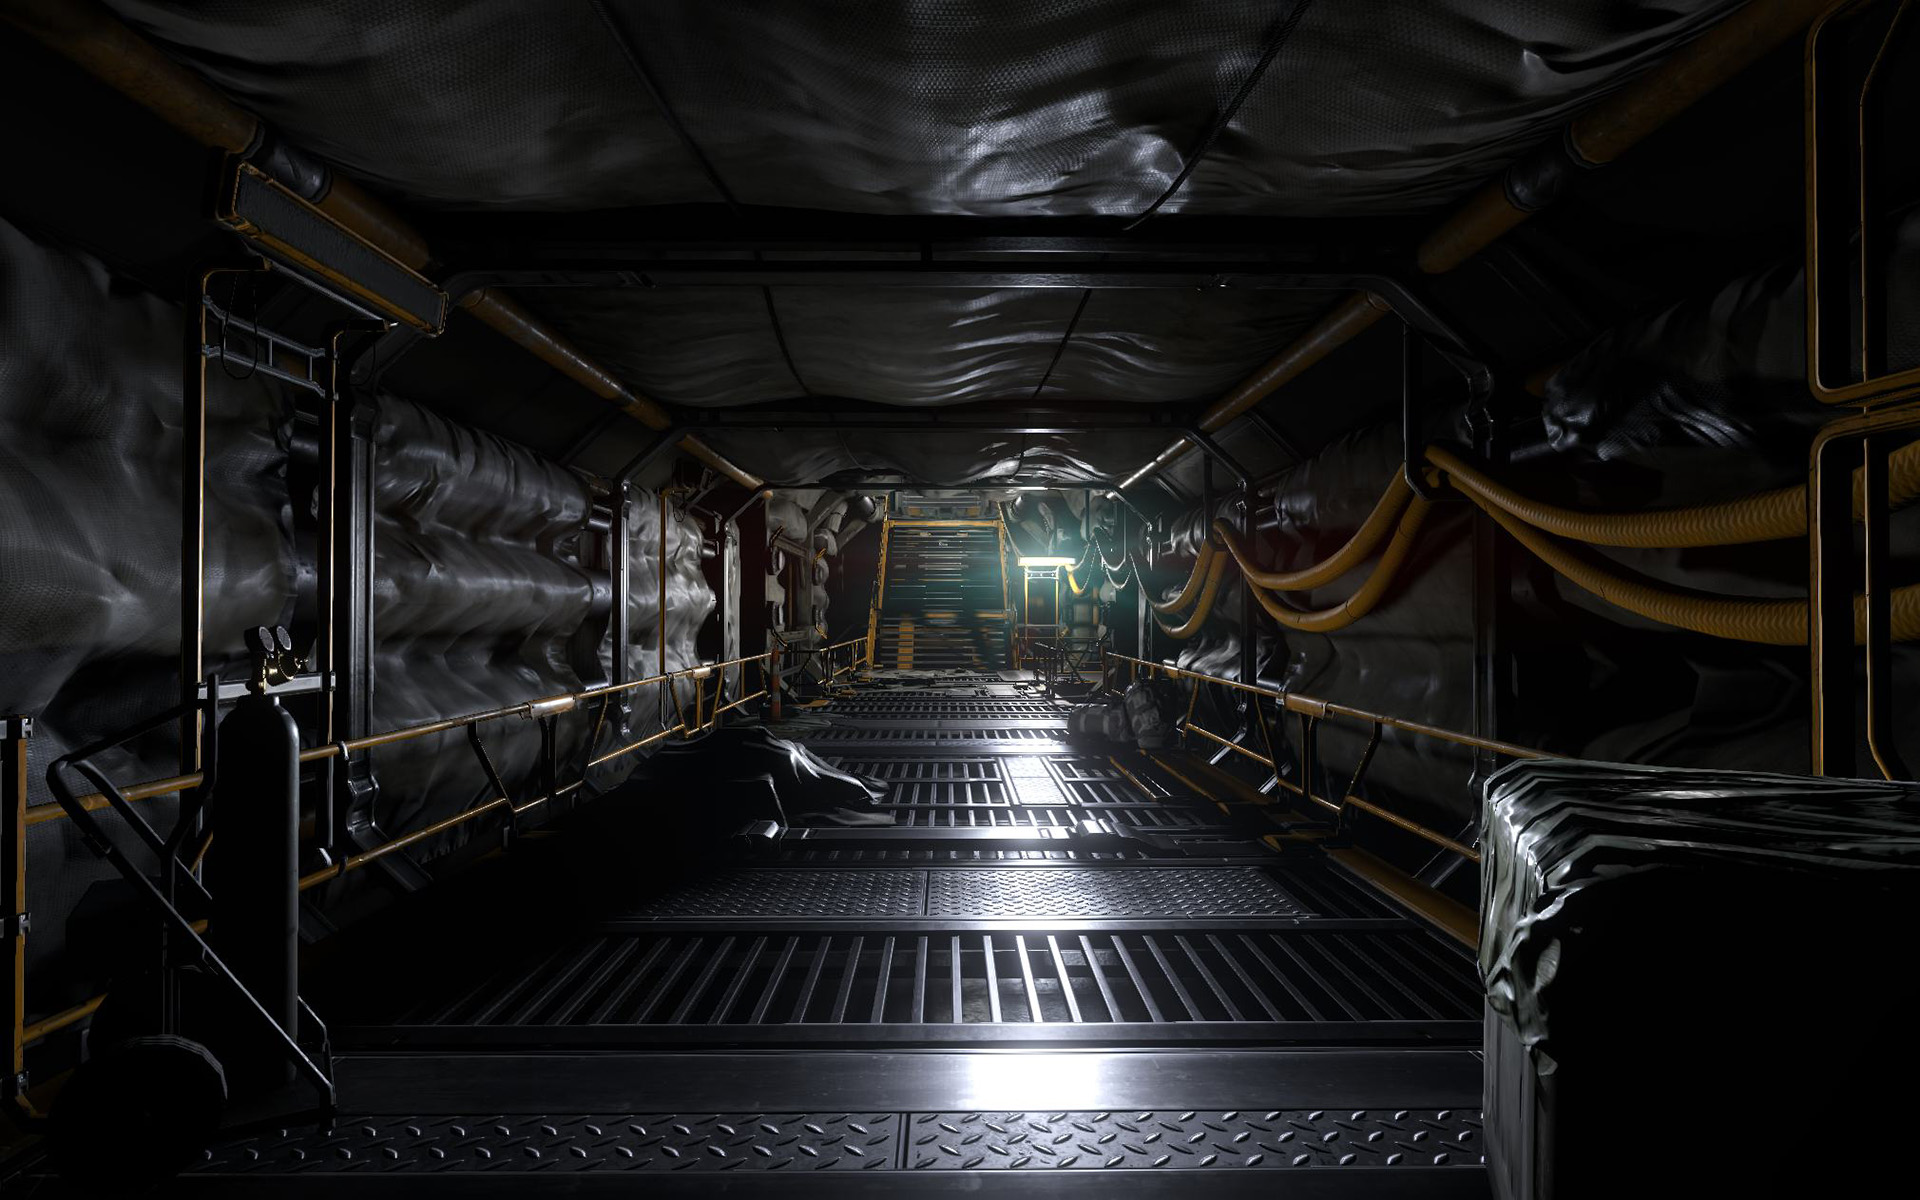
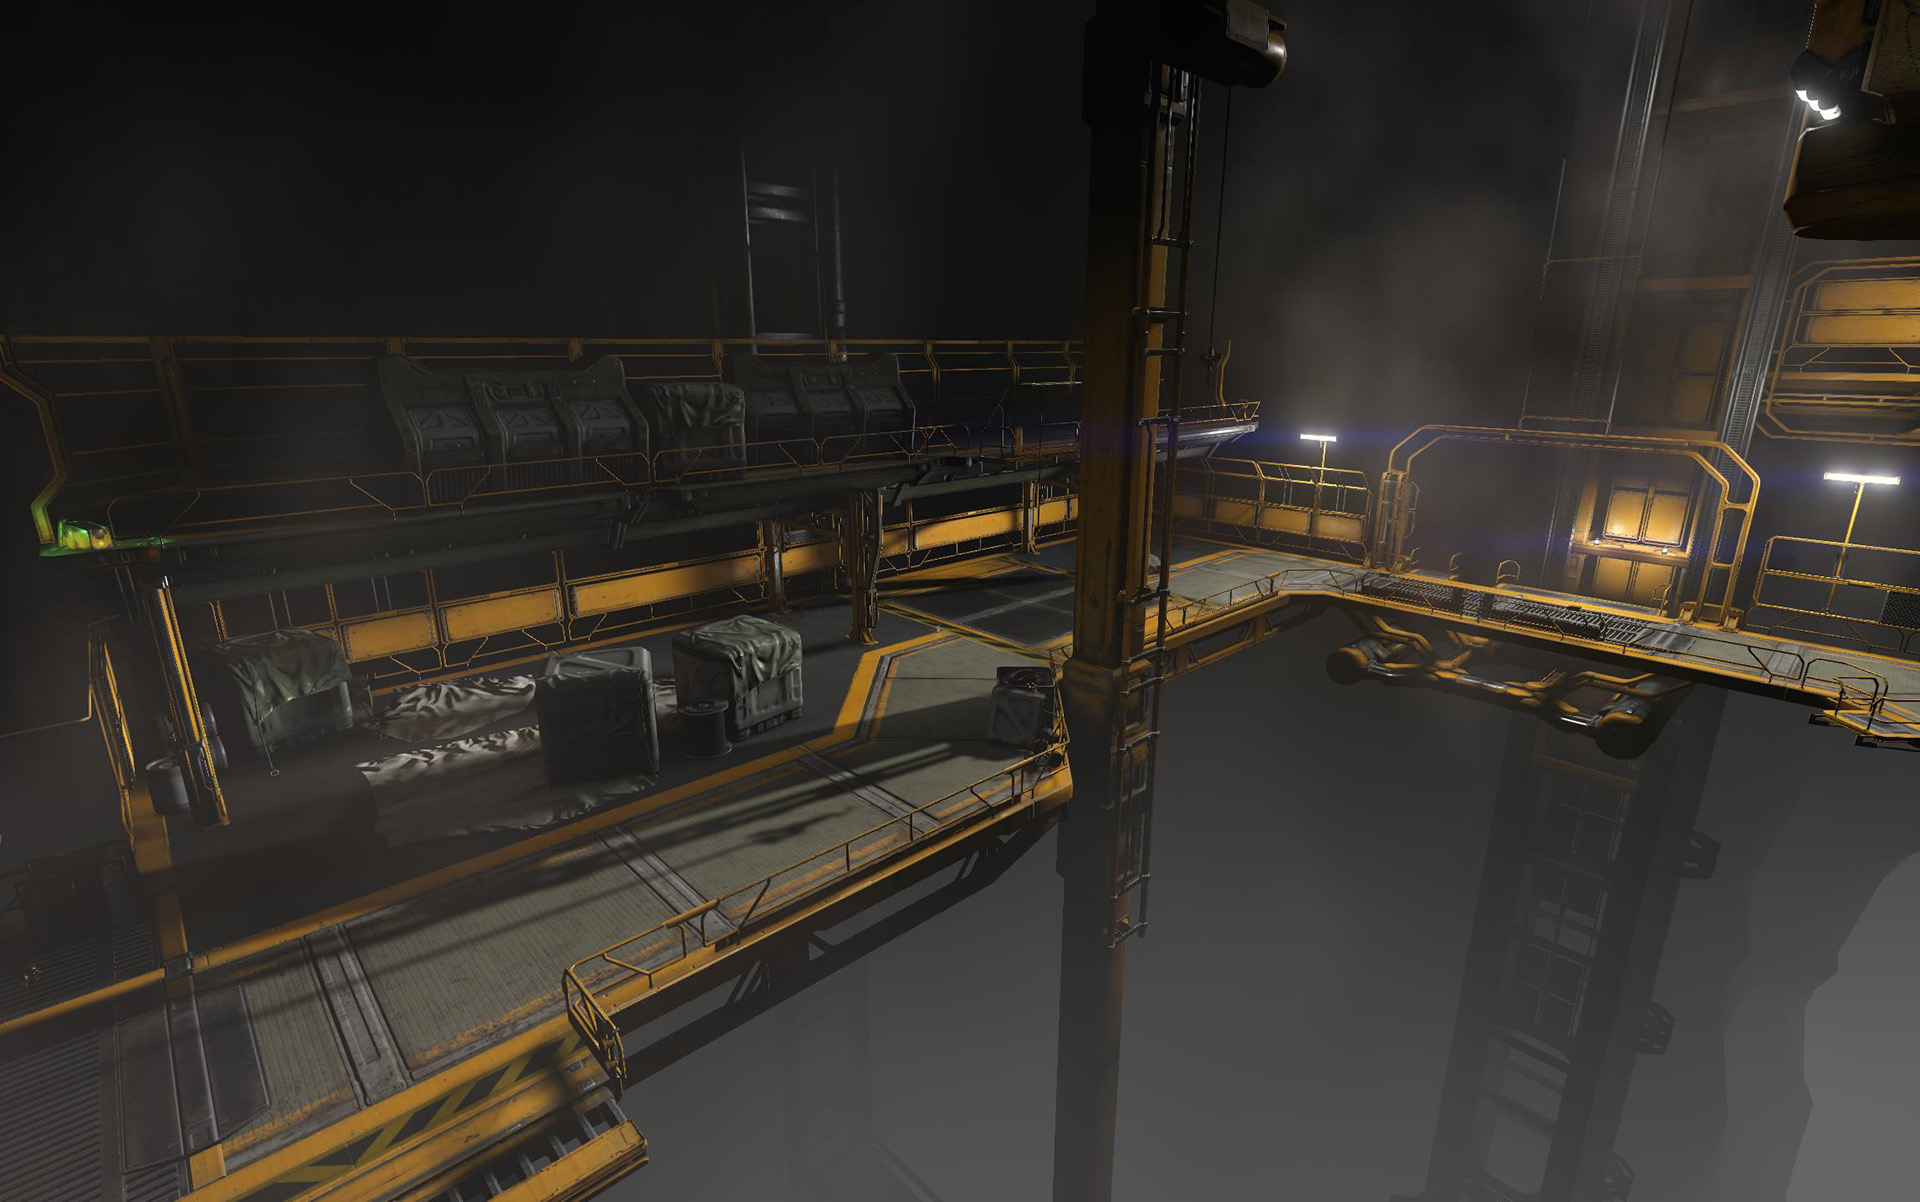
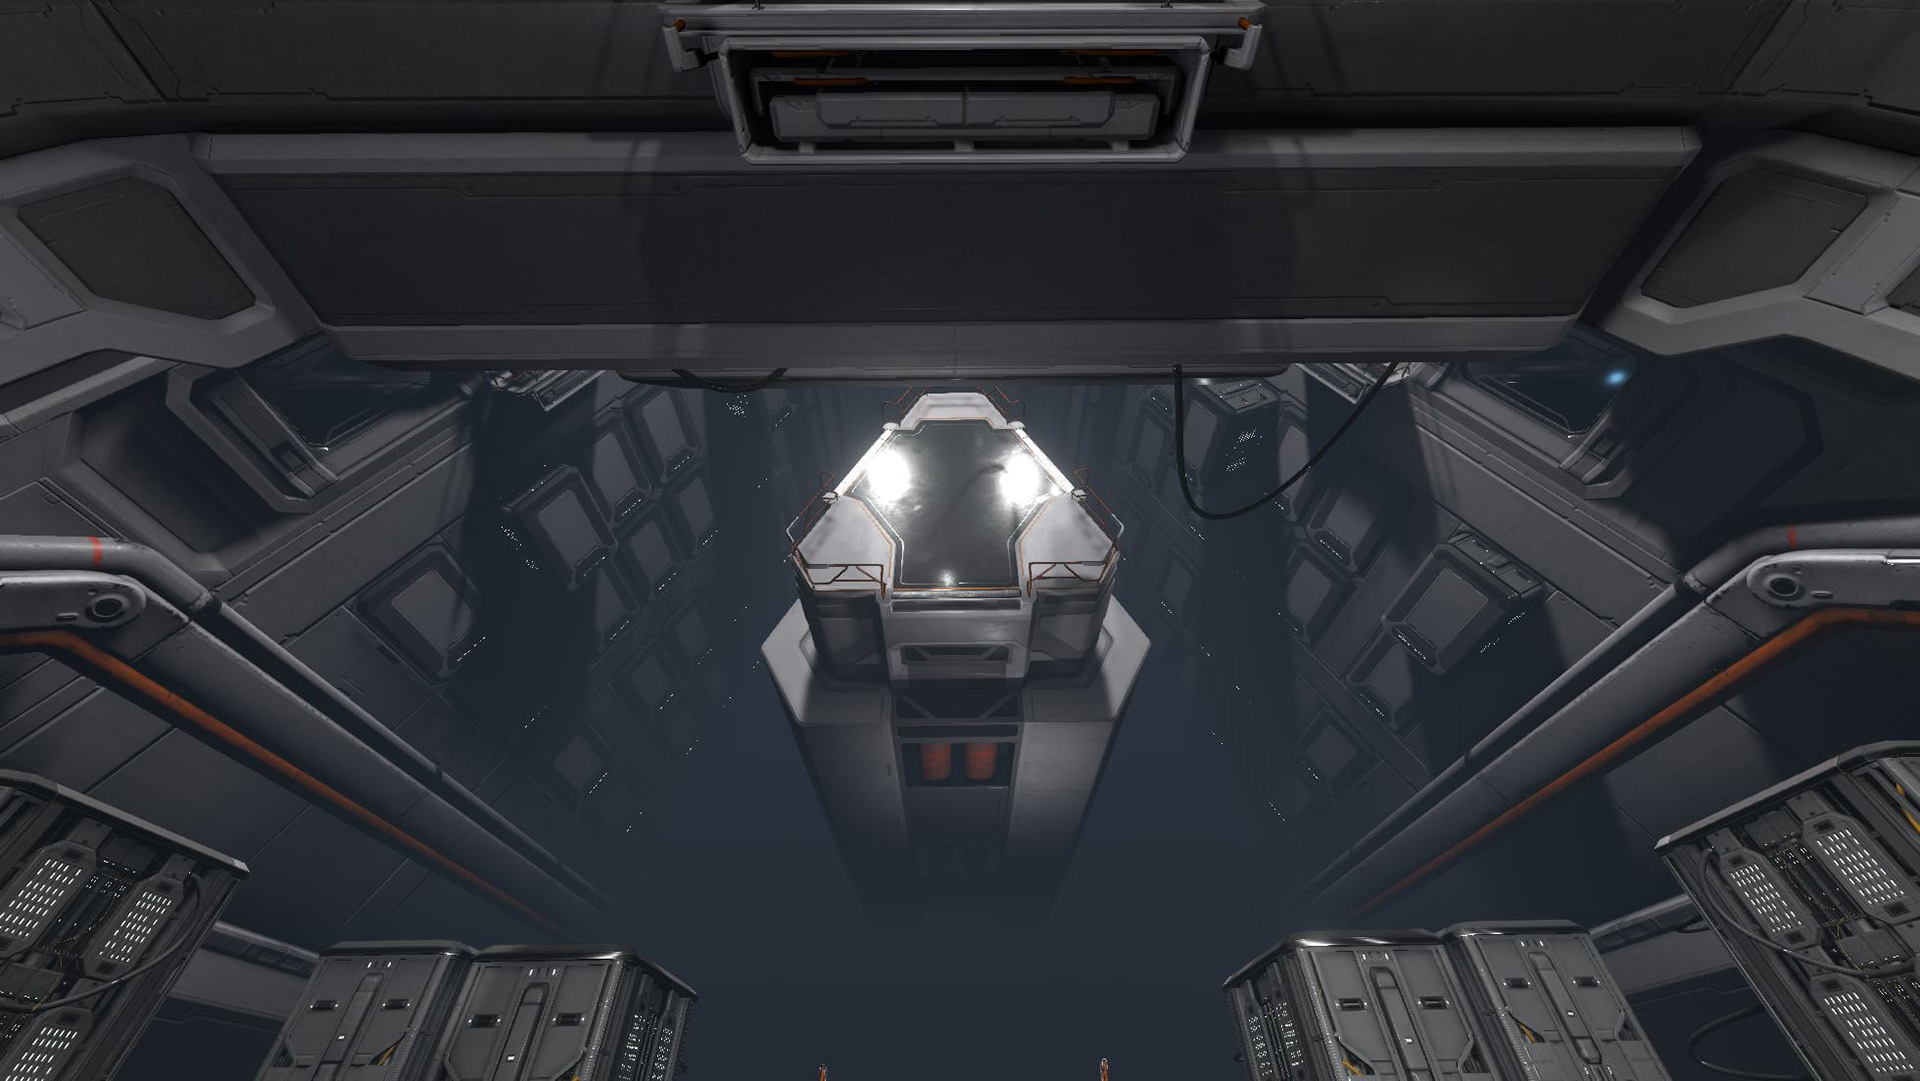
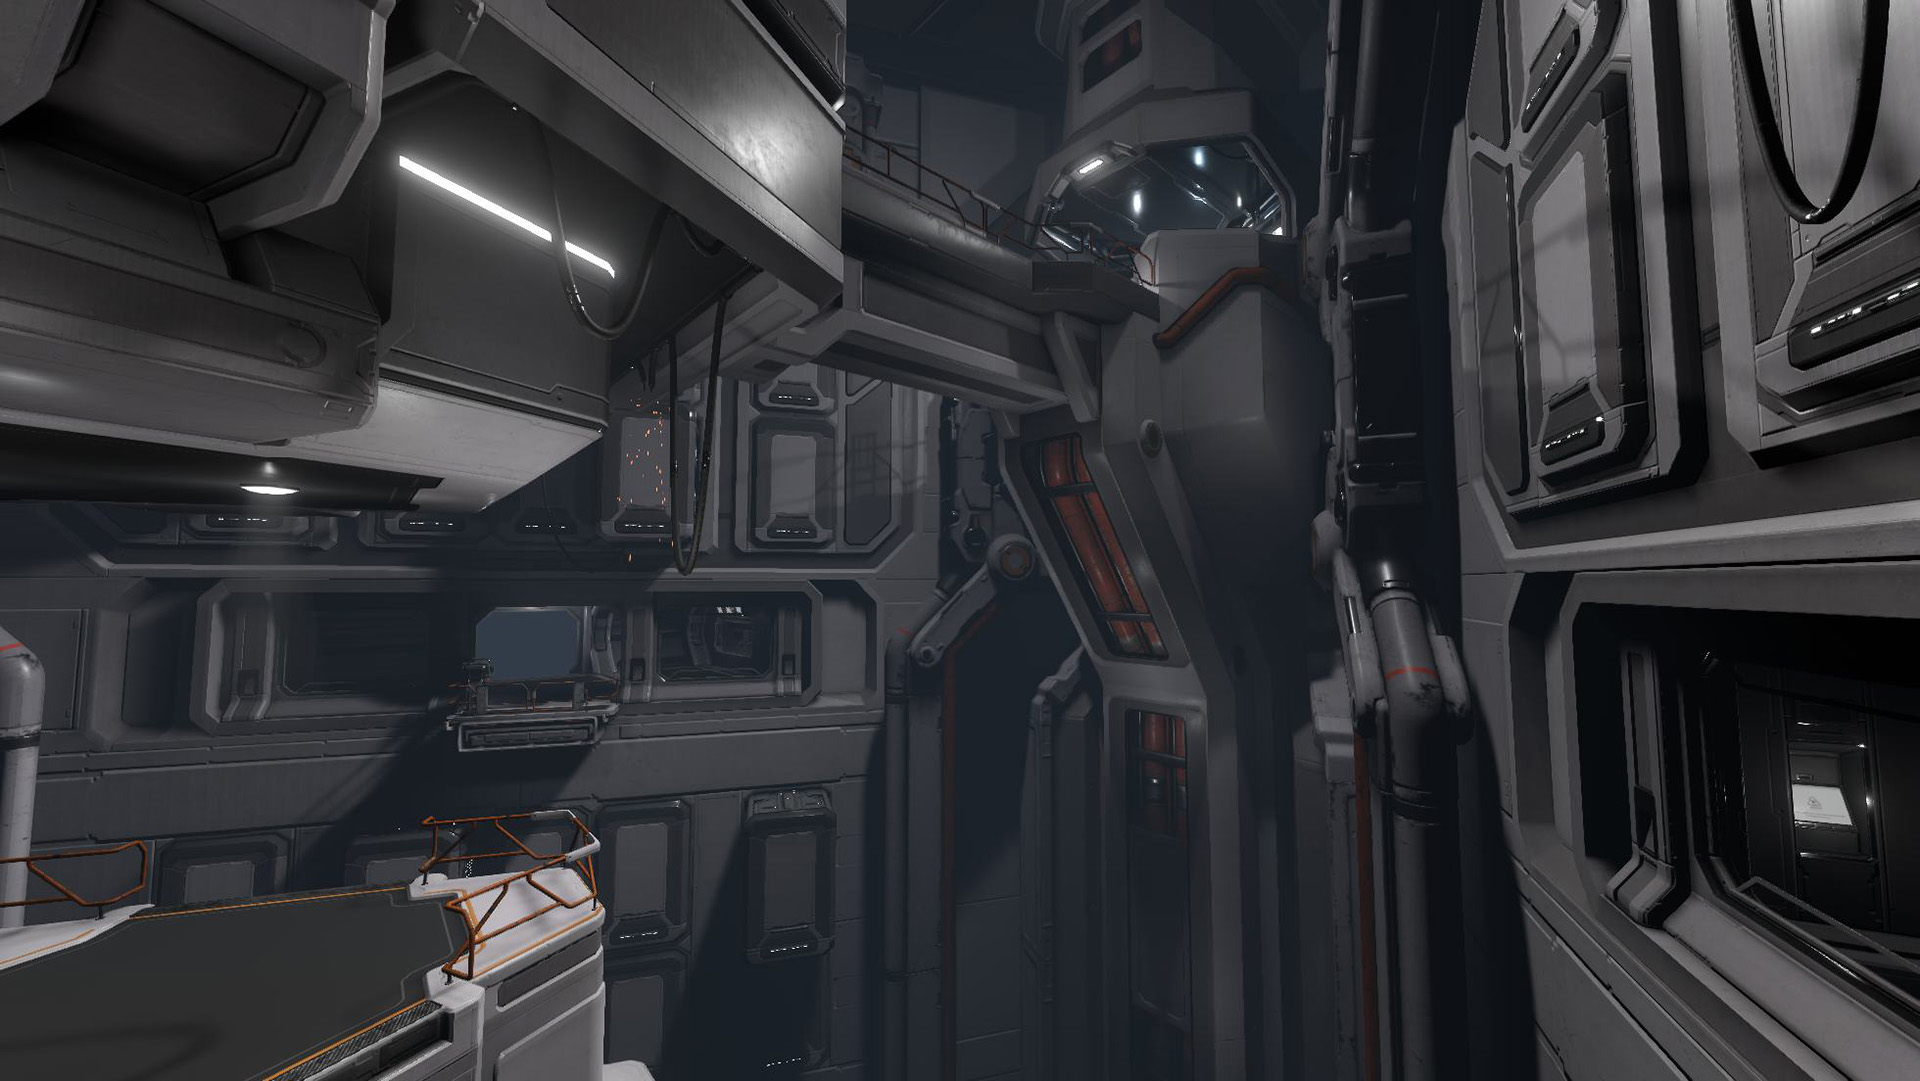
Pre-final area where I did final geometry, UVs, scripting & creation of animated components, and first pass lighting/fx/decals.
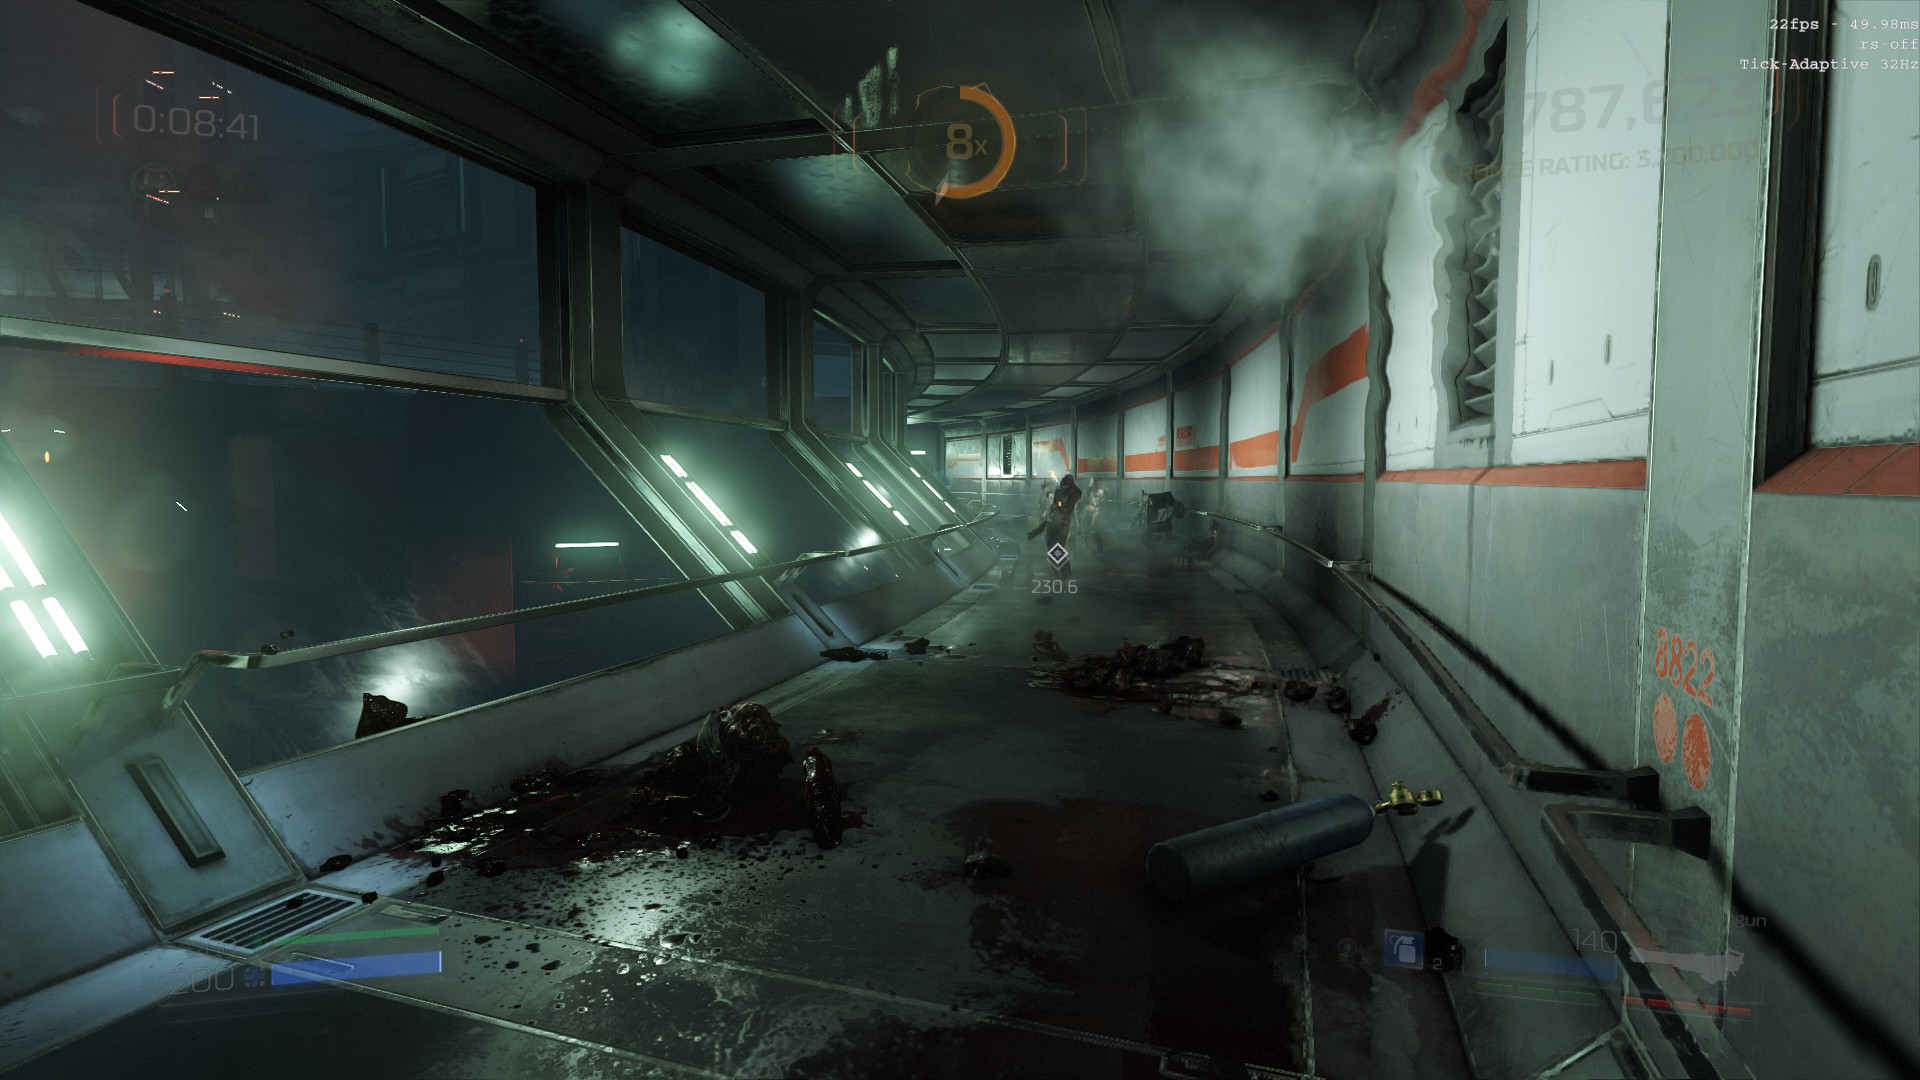
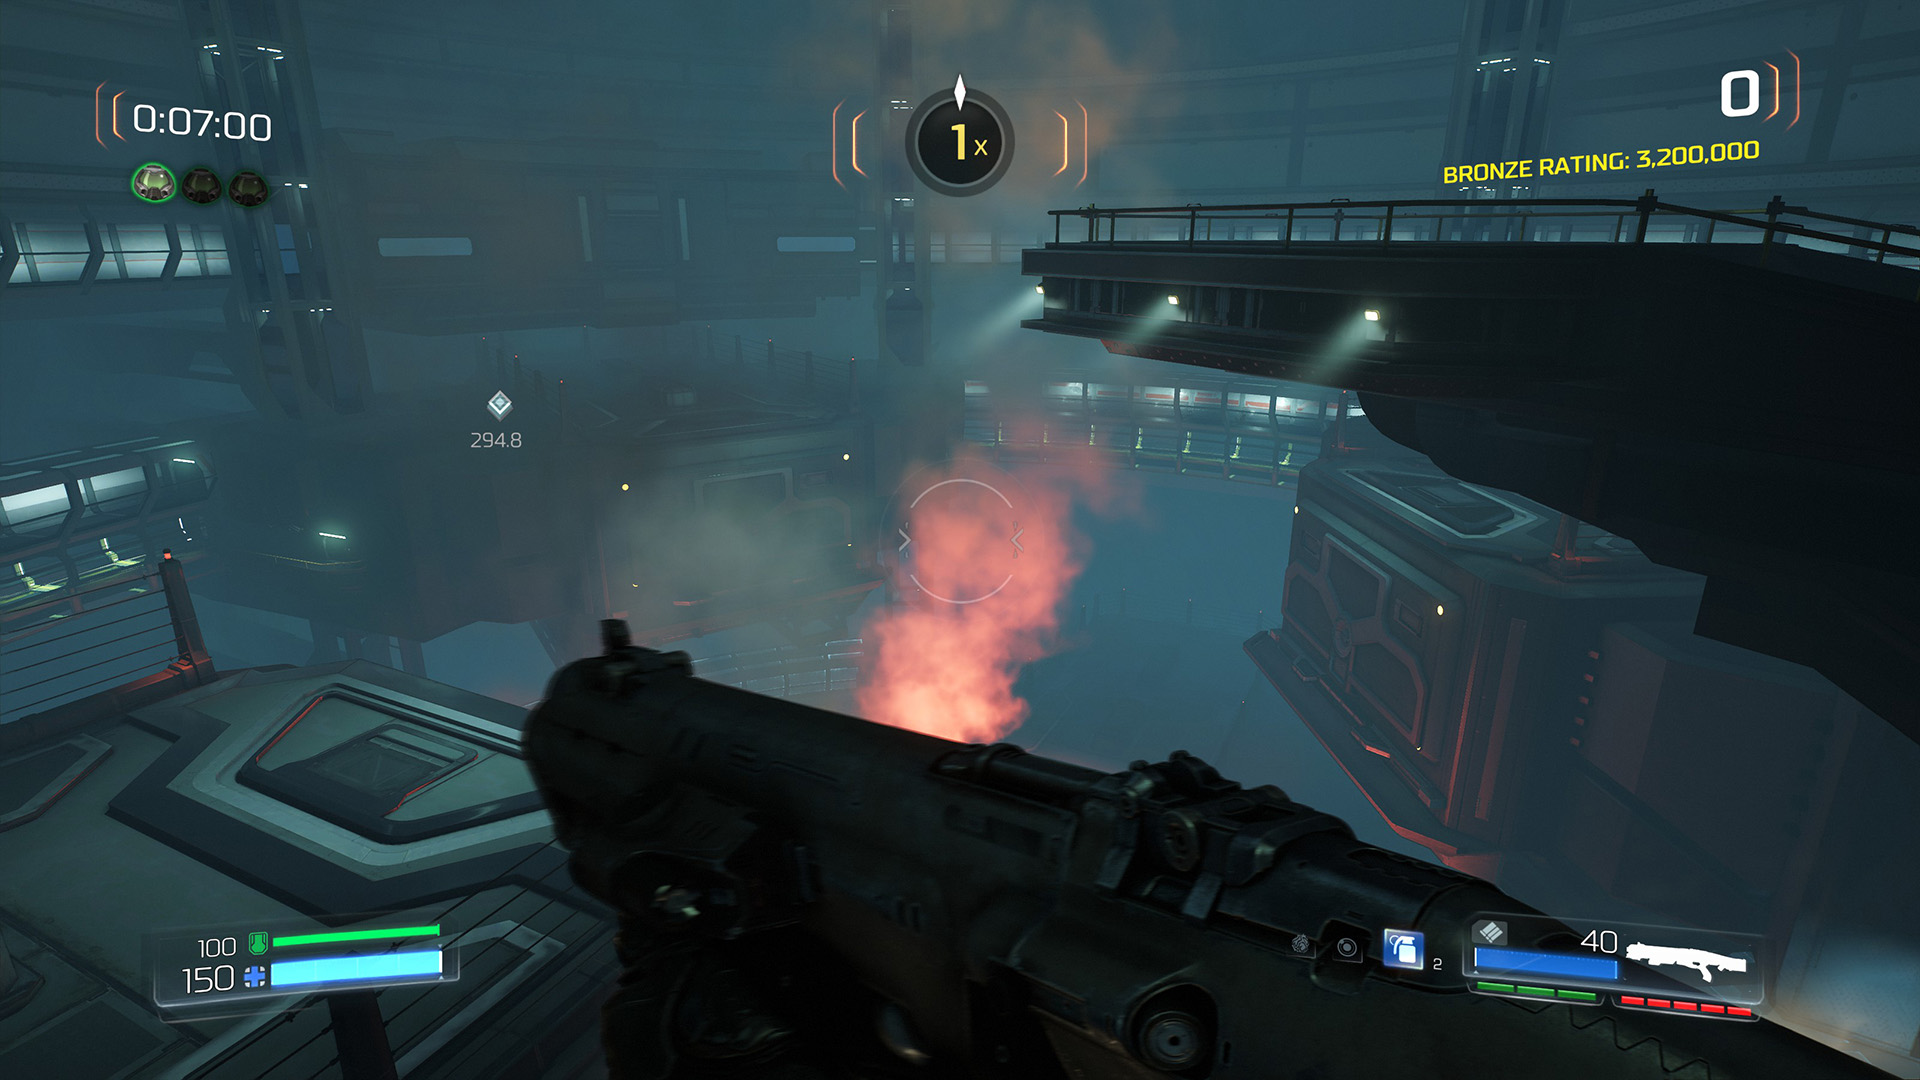
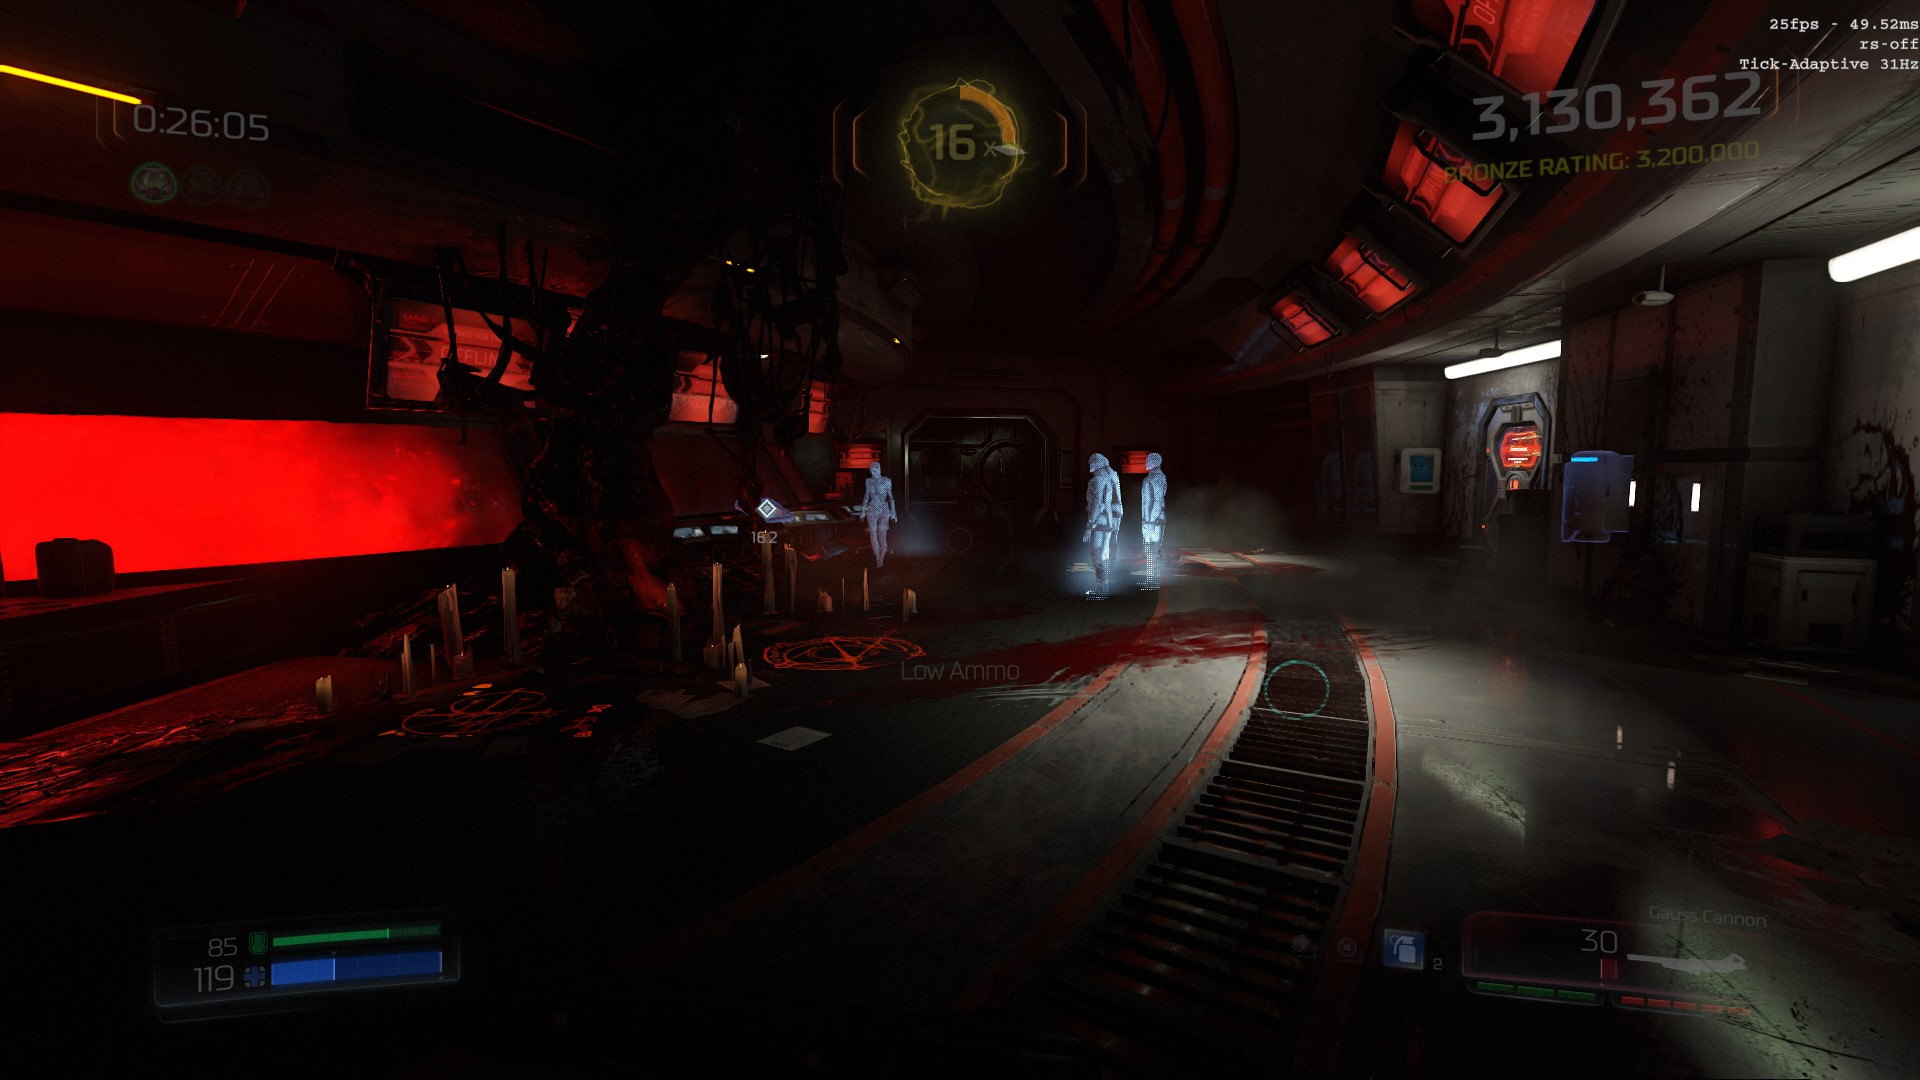
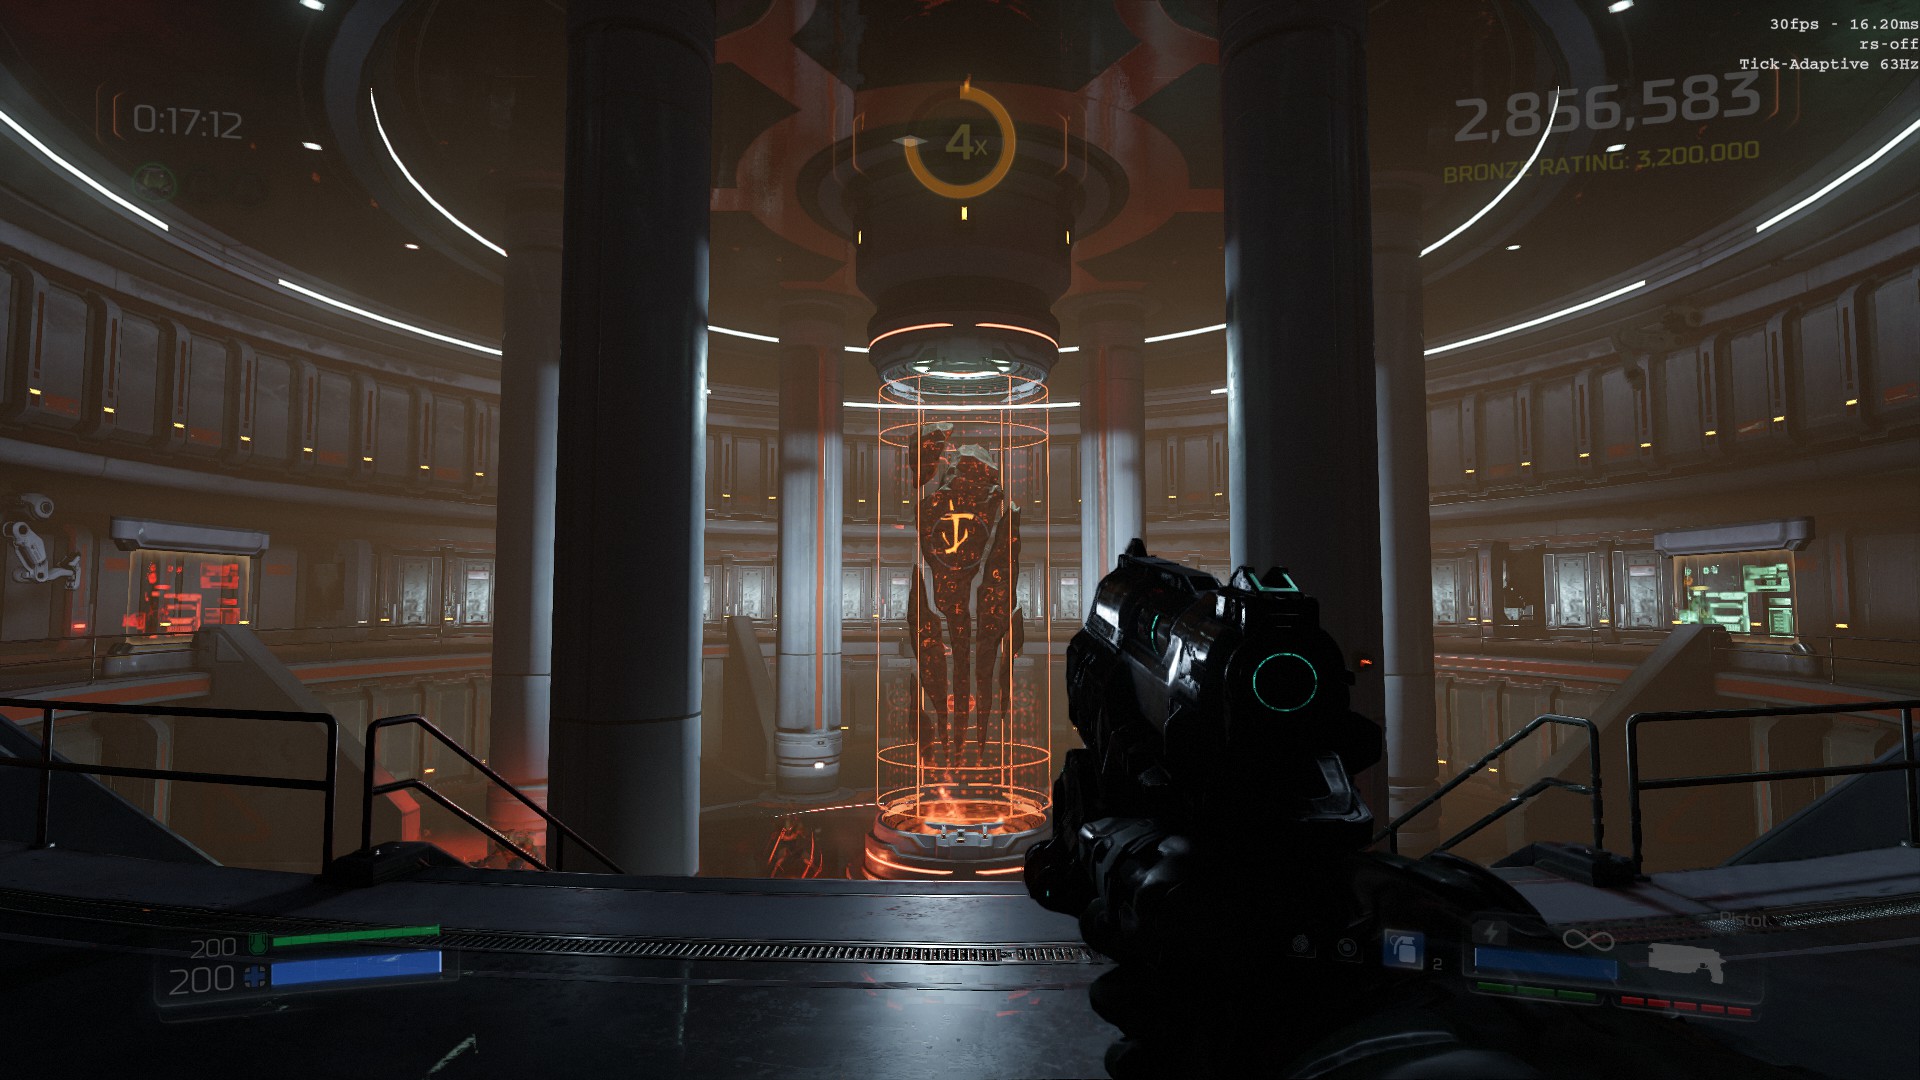
Screenshots of Work
Once a screenshot is open you can use the left & right arrow keys to quickly move between screenshots.
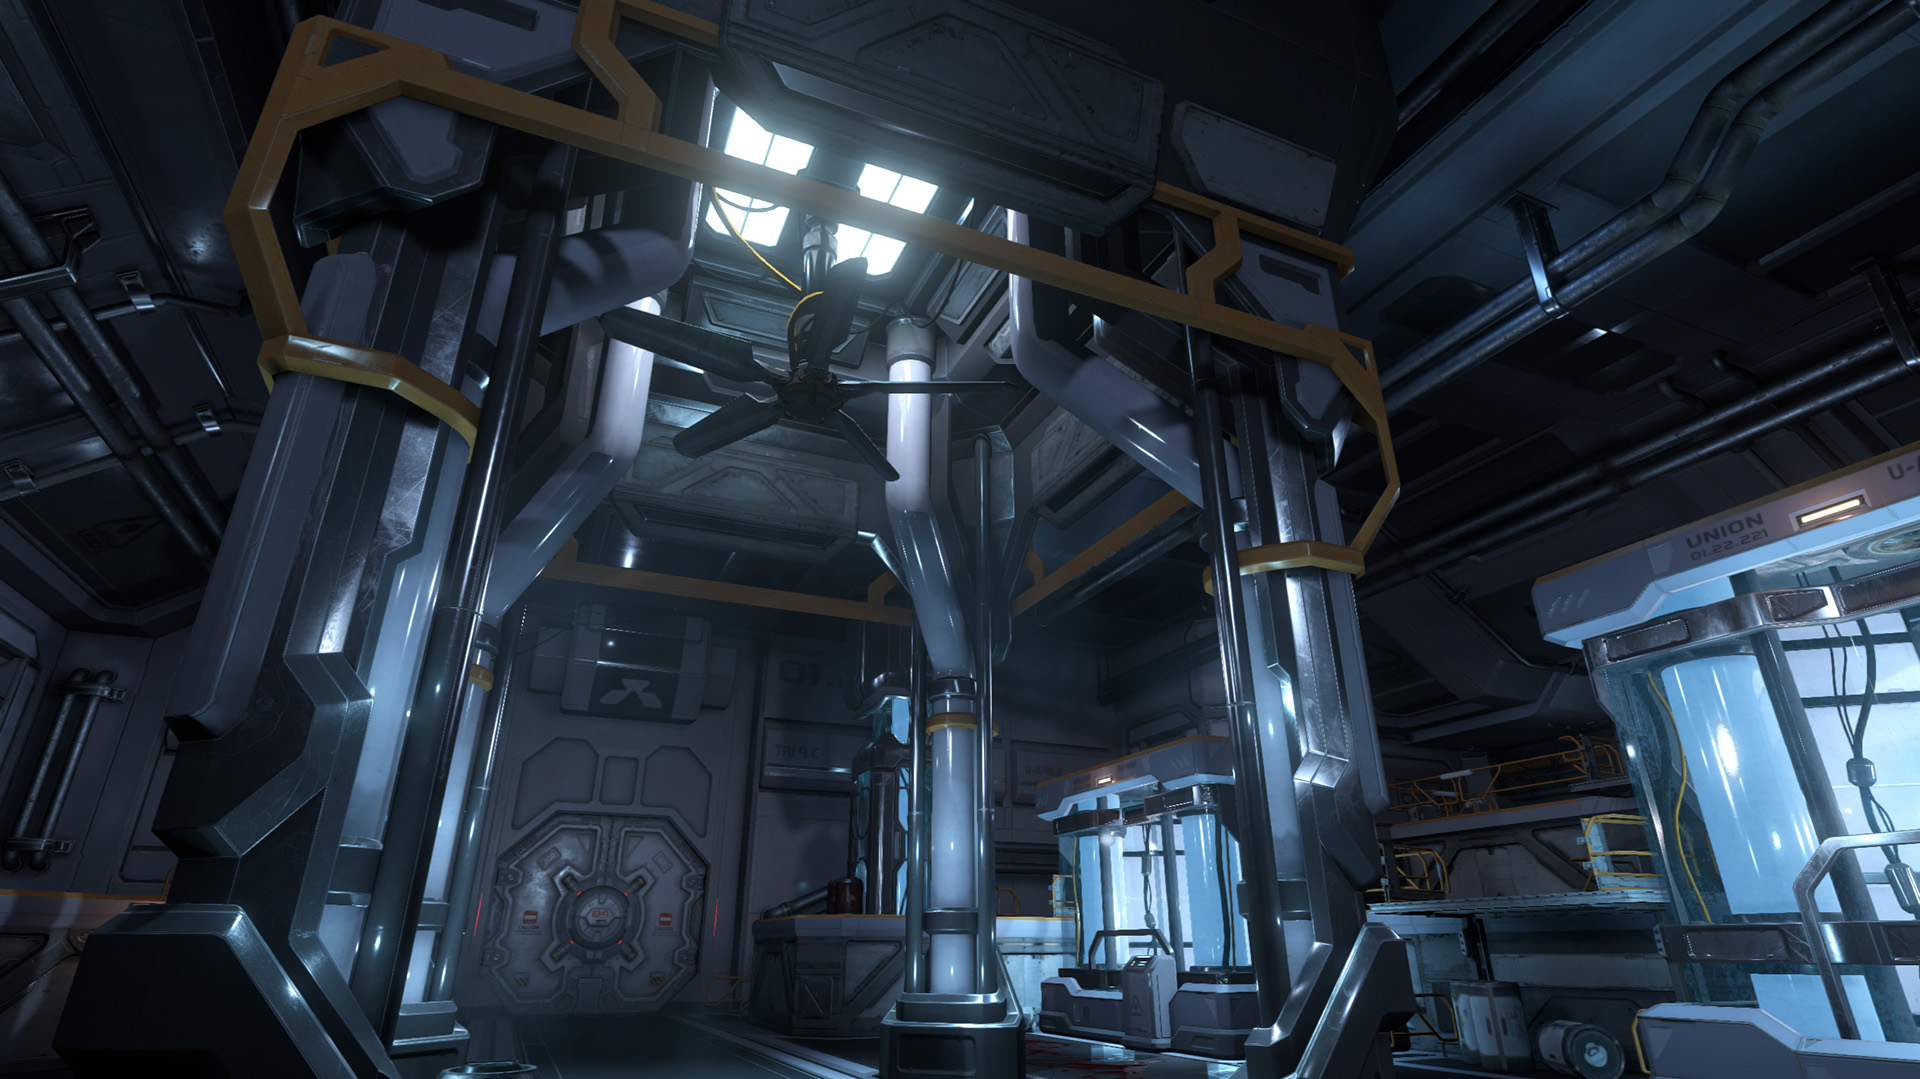
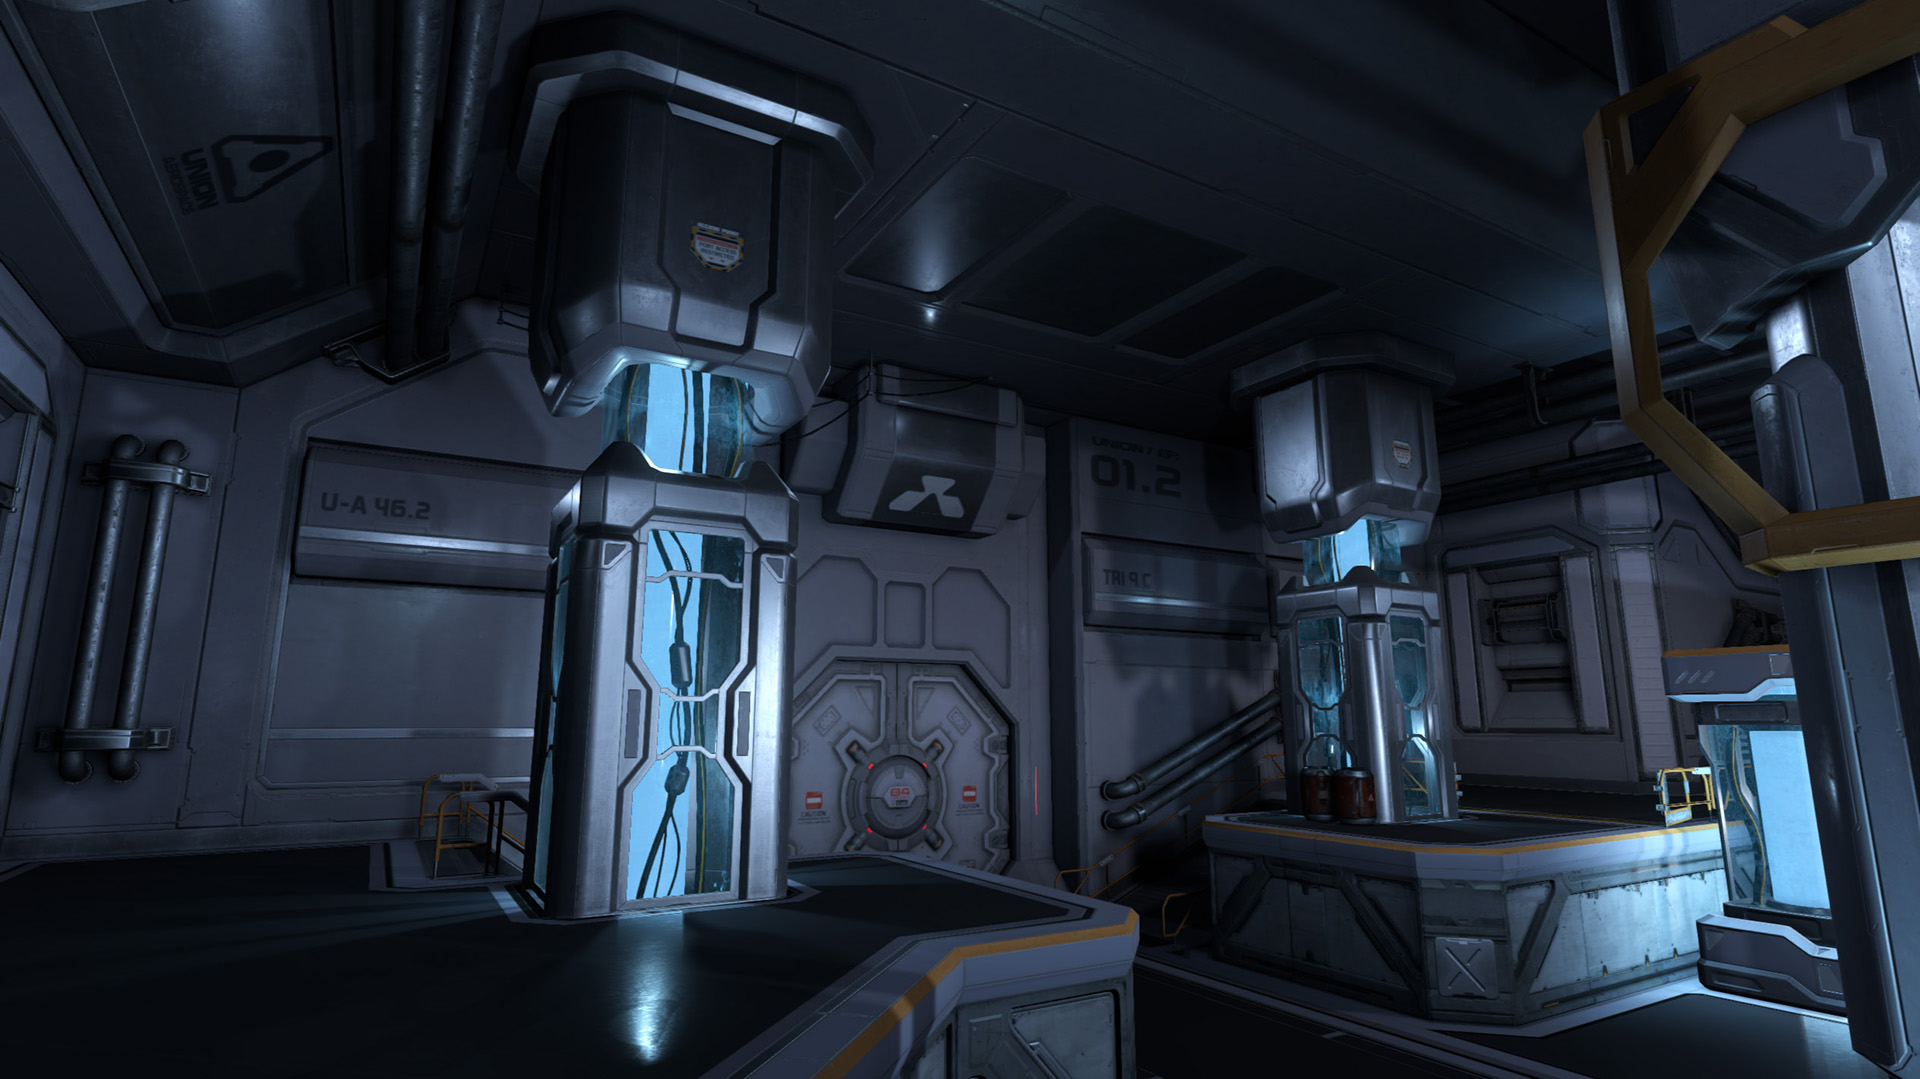
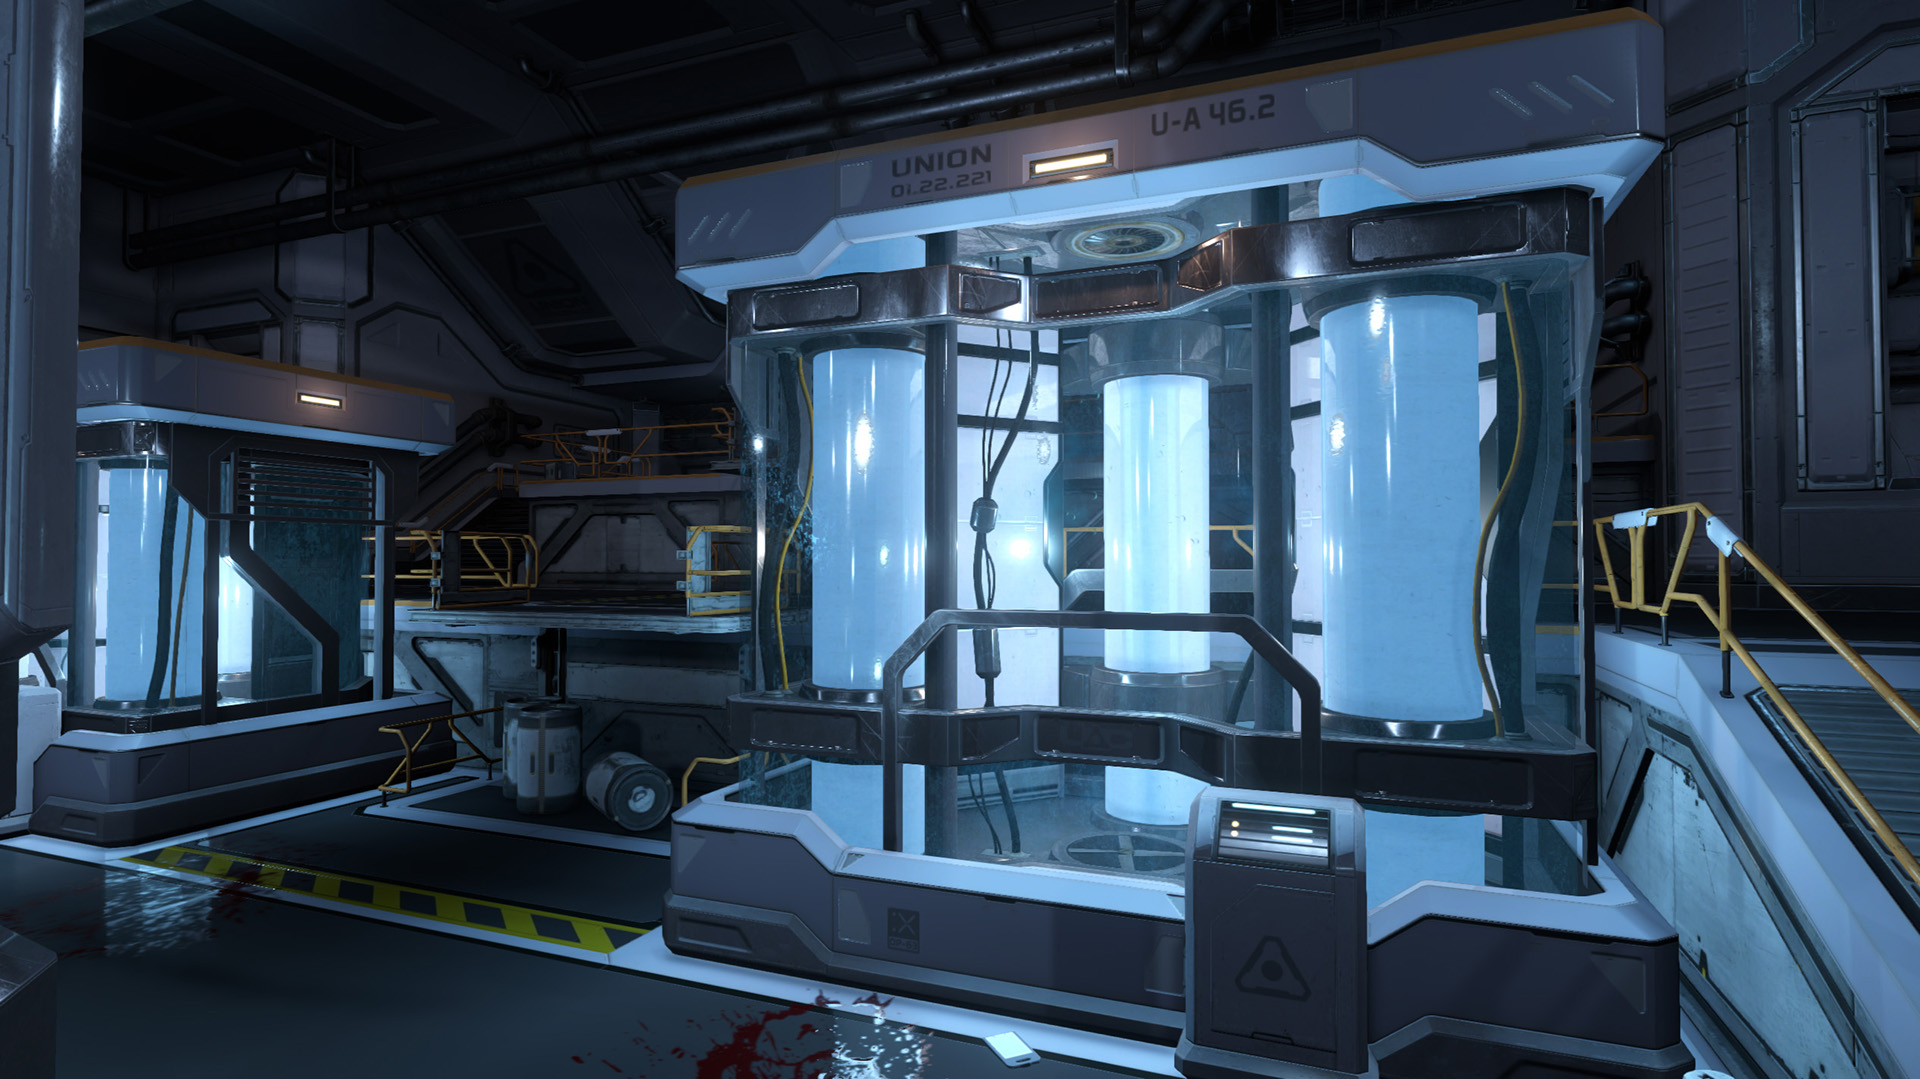
All screenshots below are areas/levels I did final geometry, UV pass, first pass lighting/fx/decals. Most of these are pre-final screenshots.
+ To see more examples click here.

Environment Art Process
Art Direction Pillars & Tone
Similar to the design pillars, art direction had its own pillars but represented visually into a few sheets capturing general tone, color palettes, stylization, detail balance, shape goals, etc. Early on the human body was a reference for the industrial spaces within Doom.
Doom’s environments were broken down into four main categories: Blue Collar, Yellow Collar, White Collar, Hell. Each environment set had its own direction sheets, pillars, and we also generated vignettes which were small example environments for each set.
Art Thought Process During Blockout
While developing a level or space I often attempt to hit visual goals as well as gameplay goals. Gameplay always has to come first, players must enjoy what they’re doing & not be confused. Art & design are often not mutually exclusive and often there’s give & take without compromise to either.
In some rare cases environments were created from concept before blockouts. These were mostly narrative, skybox, exteriors, or visual beats that were breaks in combat. The majority of spaces were started from level blockouts and occasionally blockouts had paintovers before final art pass.
During development we tried to pair artists with designers in the hope that art/composition goals could also be met, plus it helped artists to be aware of the gameplay & narrative goals. For myself, I helped blockout several of the levels & spaces that I also did the final art pass on.
- From doorways & entryways I think about 2D composition goals. Details below.
- What is the first, second, & optional third major read. What objects call attention or should?
- Flow – How does lighting & shape lead the eye. Try to guide them toward gameplay relevant locations.
- Golden Ratio/Rule of Thirds – Whenever possible utilize the rule of thirds. This can be where an object is placed & shape details within an object.
- Dominate/Subdominate Shapes – Similar to first read and second read, what is the major shape & secondary shape. Sometimes two separate objects, sometimes multiple shapes within a single structure.
- Balance of Detail – What are you large details? Medium details? Small details? Tiny details? What is the balance?